Data exchange at UI
The data exchange operations are available at /administration/importexport. Permissions for securable Sec.DataExchange are required.
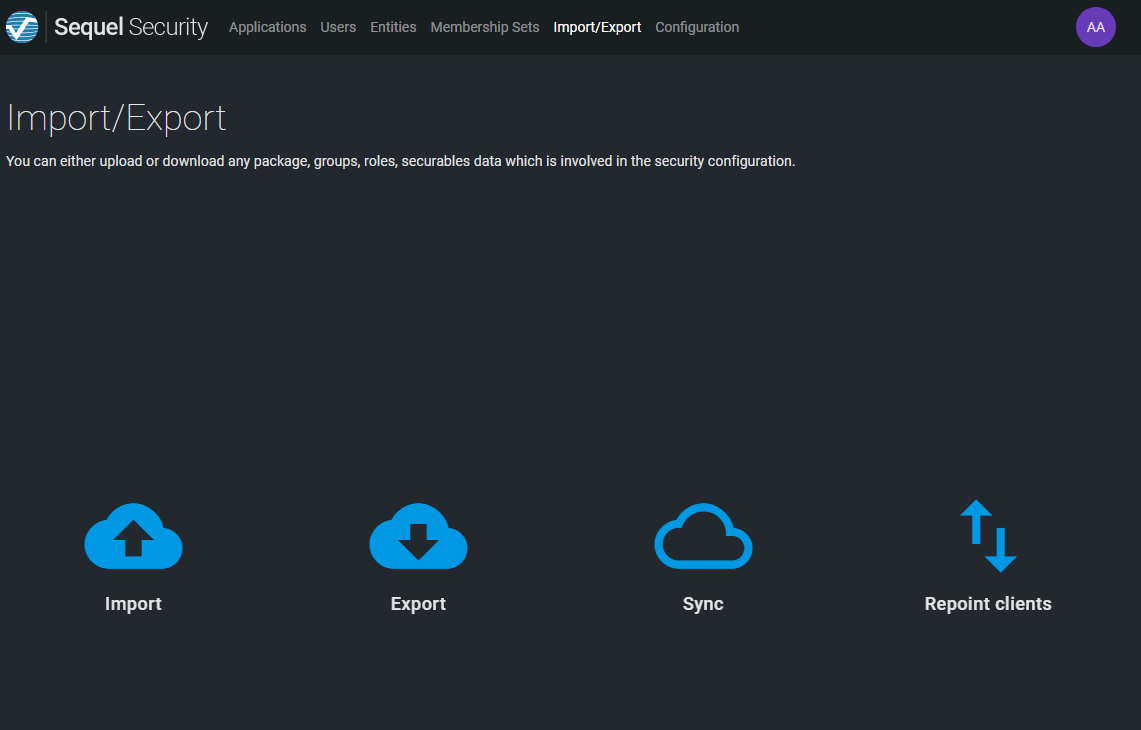
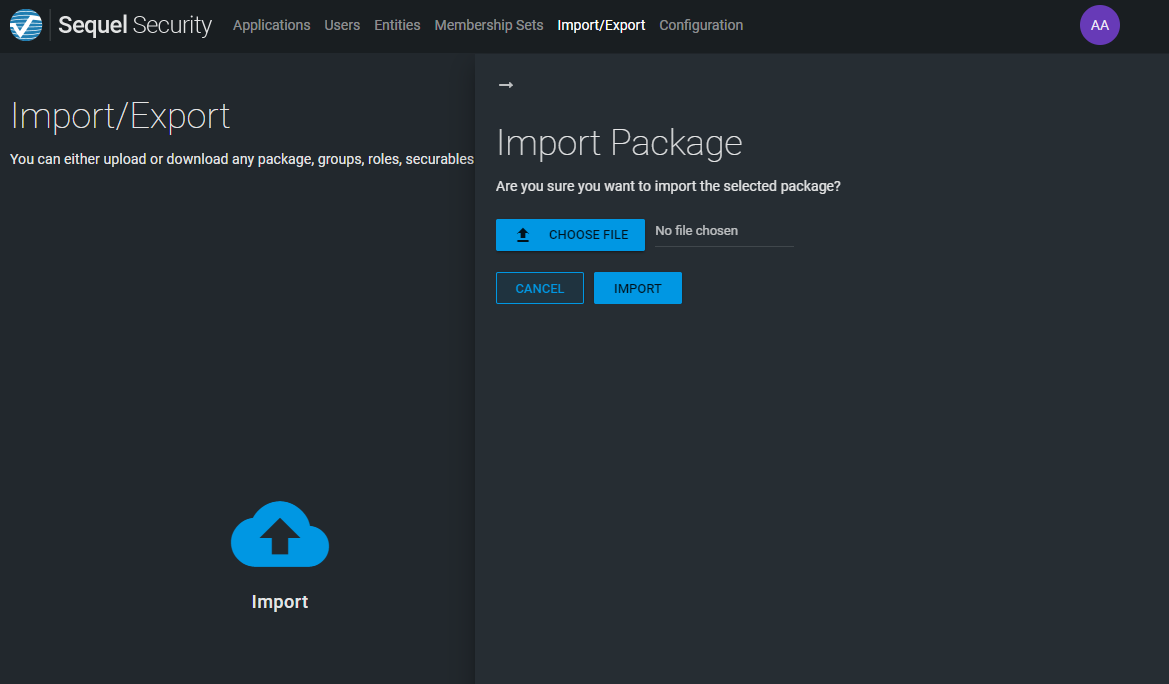
Import
Click on Import icon.
Select a file in zip format that contains a security package.
Click Import button.
From UI the unique domain available is authorization.
Export
Click on Export icon.
Select all applications or one of the existing applications.
Click Export button.
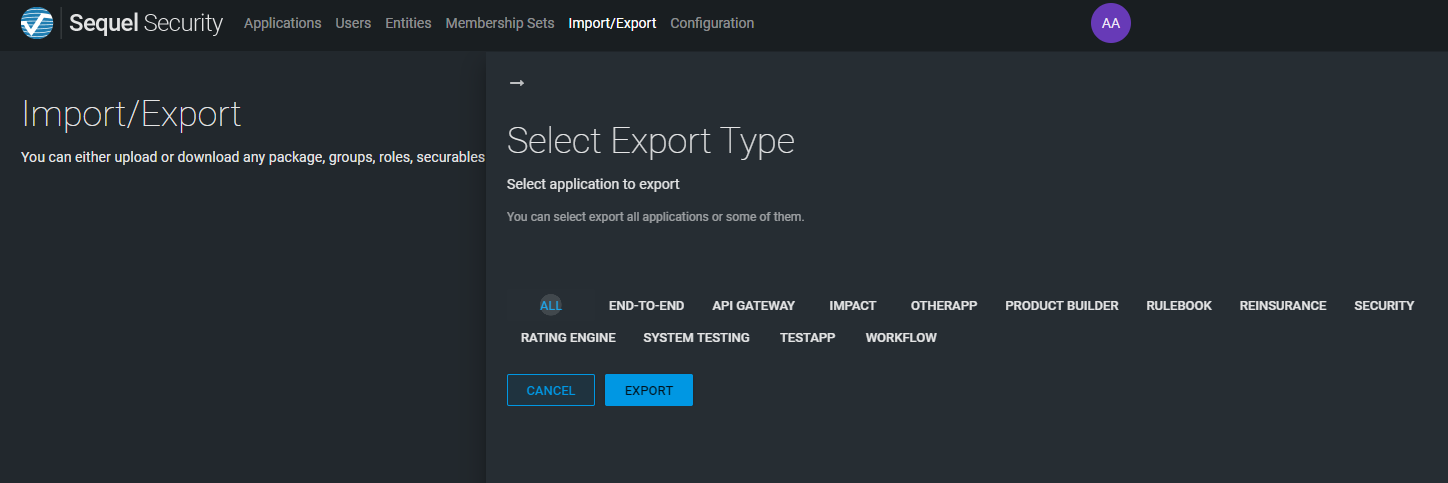
From UI the unique domain available is authorization.
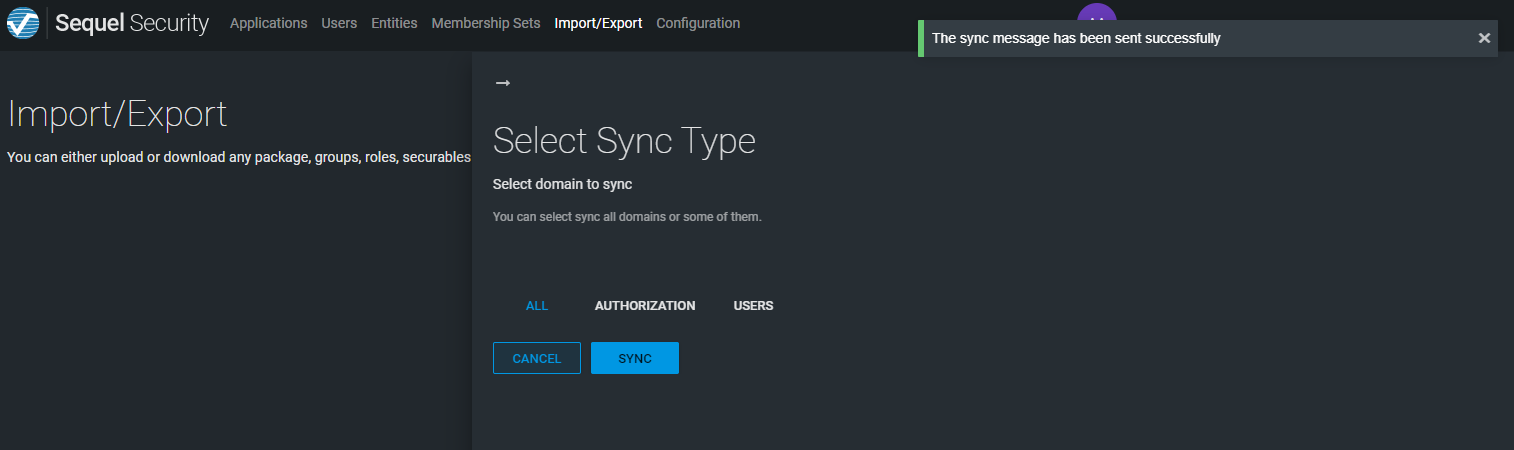
Sync
Click on Sync icon.
Select the domain to be synced: authorization, users or both (all).
Click on Sync button.
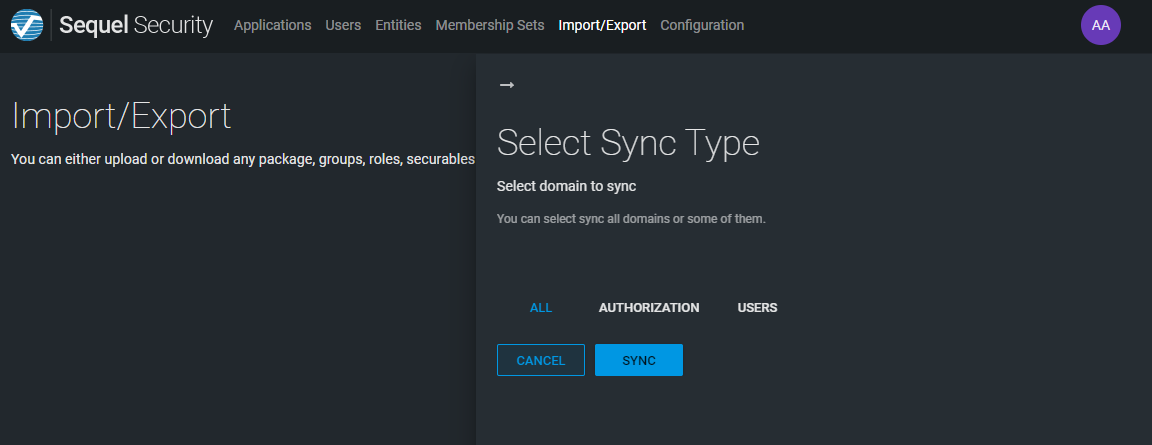
When the message is sent we receive confirmation. However, because sync depends on an external consumer we do not have confirmation that sync has been actually done.
Repoint client
Click on Repoint clients icon.
Select the original and new URI. Click on repoint.
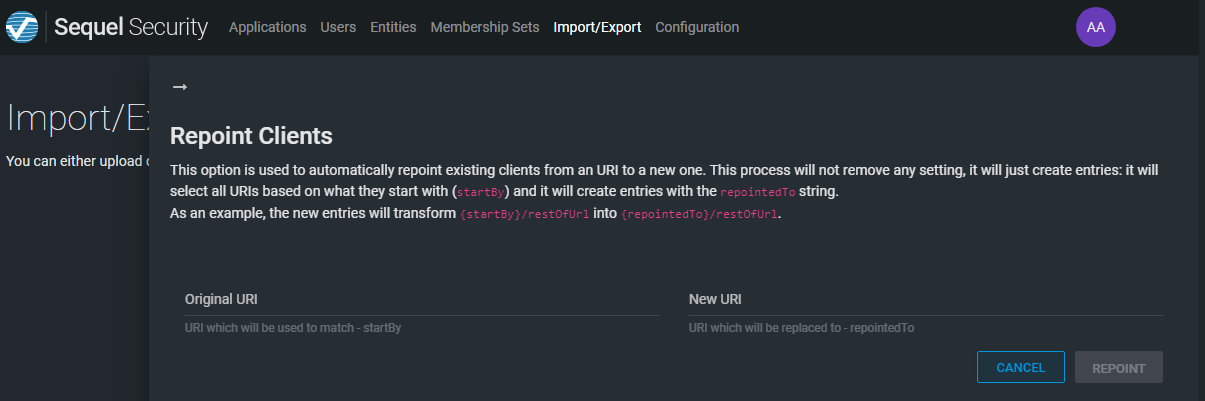
This option is used to automatically repoint existing clients from an URI to a new one. This process will not remove any setting, it will just create entries: it will select all URIs based on what they start with startBy and it will create entries with the repointedTo string.
As an example, the new entries will transform {startBy}/restOfUrl into {repointedTo}/restOfUrl.
As result of the repoint, a summary with the changes applied will be displayed:
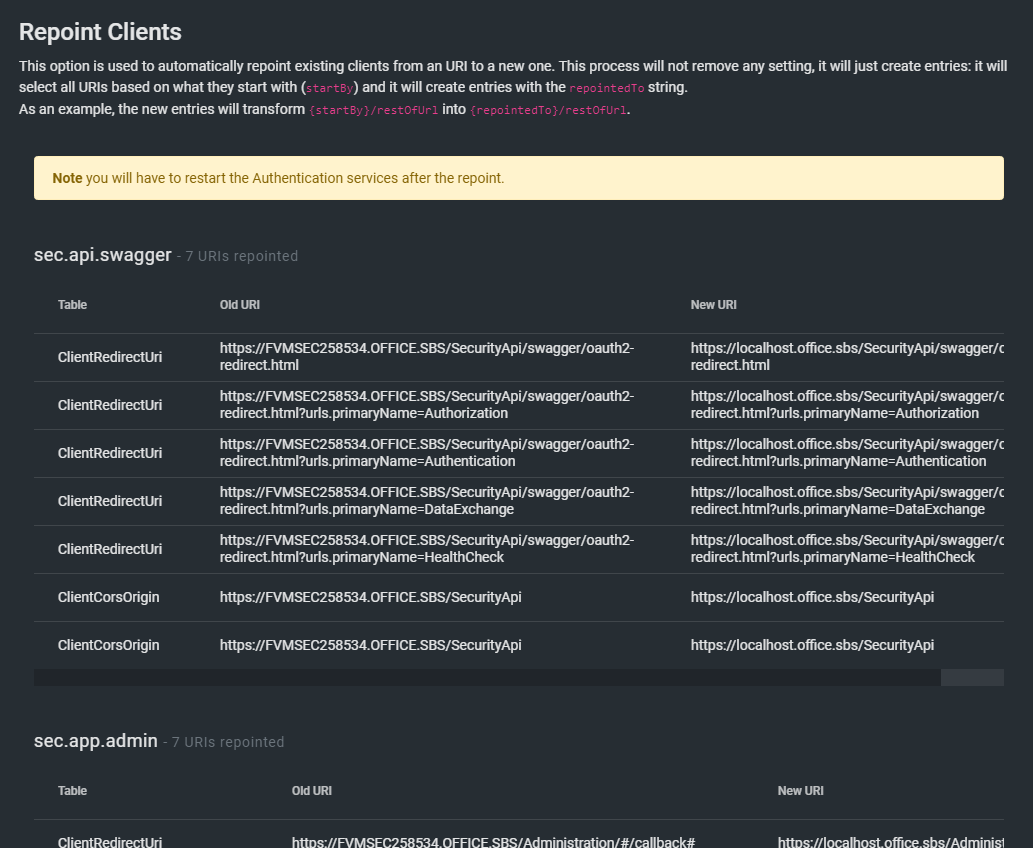
Authentication settings are cached
Keep in mind that changes to authentication settings are not reflected automatically to the Authentication services; so, you will have to restart the Authentication services after the repoint.