Azure AD Authentication Registration
Note
This registration form covers the federation of the authentication process to Azure; as an external identitu provider.
Sequel Security Services allows external providers for authentication like Azure AD. This registration process should be done for each client.
This document describes preliminary steps to be done by Sequel Clients to register a Sequel Application in Microsoft Azure.
Registering Sequel App at Azure
Registering an application in Azure is described at https://docs.microsoft.com/en-US/azure/app-service/configure-authentication-provider-aad.
This document tries to provide samples of the process. Please, keep in mind that Azure Portal UI could change since this document was released.
Required information
For registering an application in Azure we need the following information:
Application name
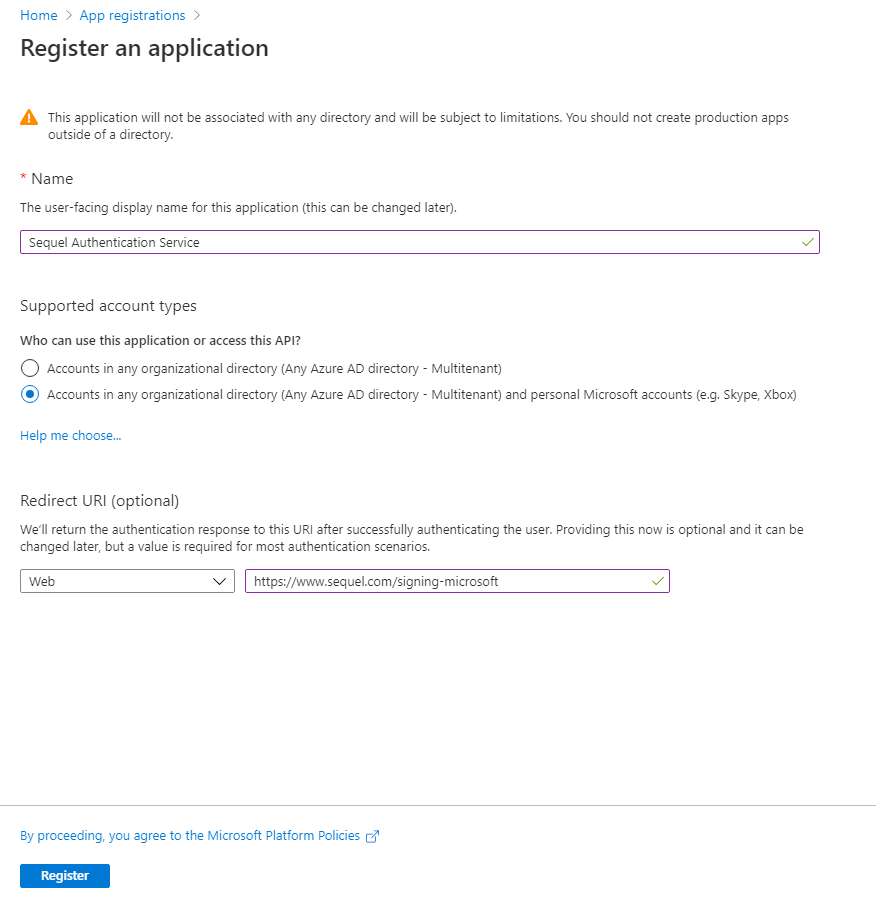
This is a friendly name for the application; we will suggest to use Sequel Authentication Service; but this can be changed and also it could include references to production or UAT environments (ie. Sequel Authentication Service - Production, Sequel Authentication Service - UAT).
Redirection URI
This is the public URI of the Sequel's authentication service. Usually, it looks like this: Sequel-AuthN-Base-URI/signing-microsoft (e.g. https://sequel_domain/Authentication/signing-microsoft). For this implementation the URI will be:
https://TO_BE_CONFIRMED/signing-microsoft
Register an application
As a summary of this process, we will have to perform the following steps:
-
Sign in to the Azure portal.
-
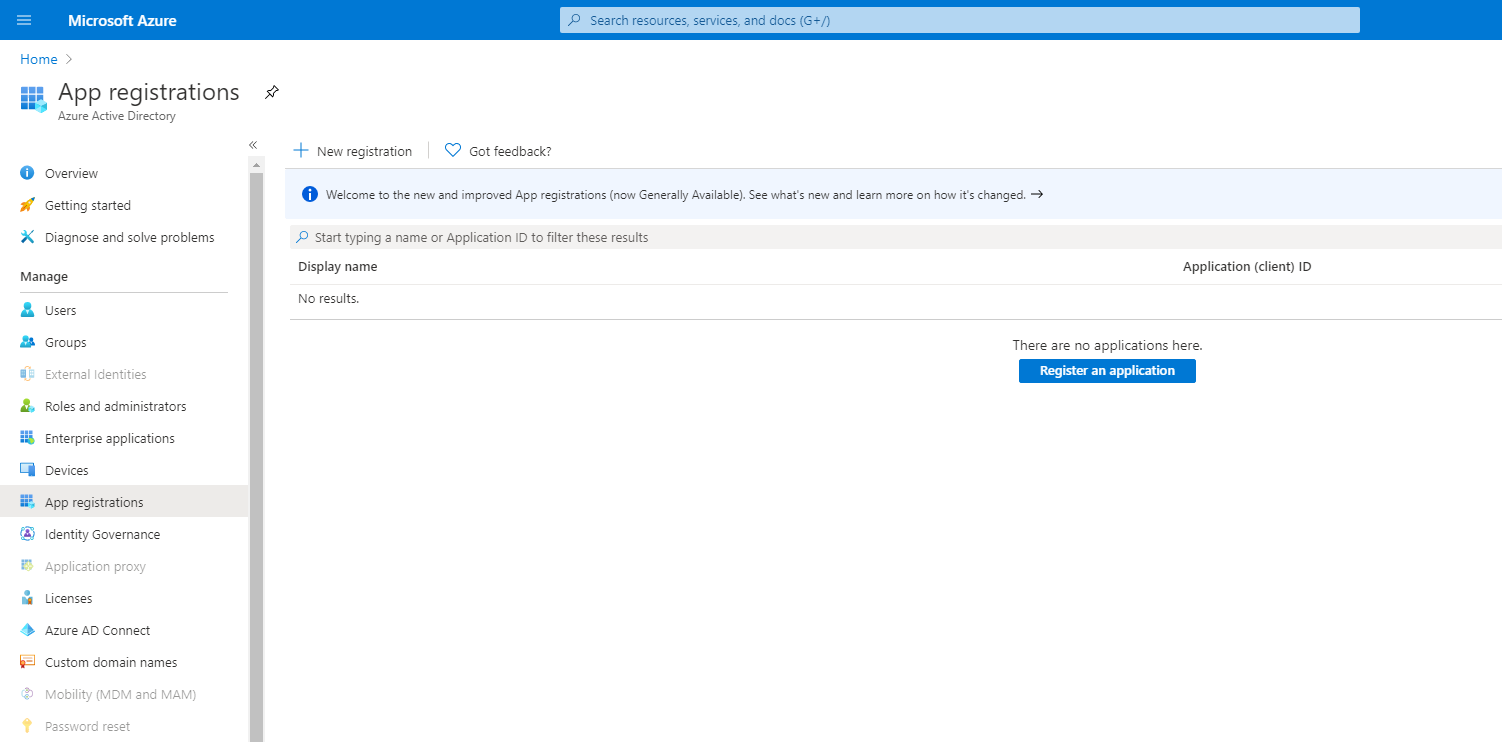
Select Azure Active Directory > App registrations > New registration.
-
In the Register an application page, enter the Name for registering the app as described above.
-
In Redirect URI, select Web and type the redirect URI provided above.
-
Select Create.
-
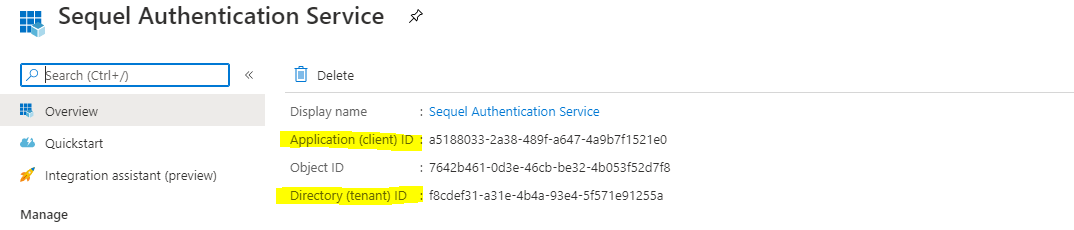
After the app registration is created, copy the Application (client) ID and the Directory (tenant) ID for later. This information has to be provided to Sequel in order to register the SSO with Azure.
Note
It is possible to define multiple redirection Uri for the same application, this is covered in Microsoft's documentation.
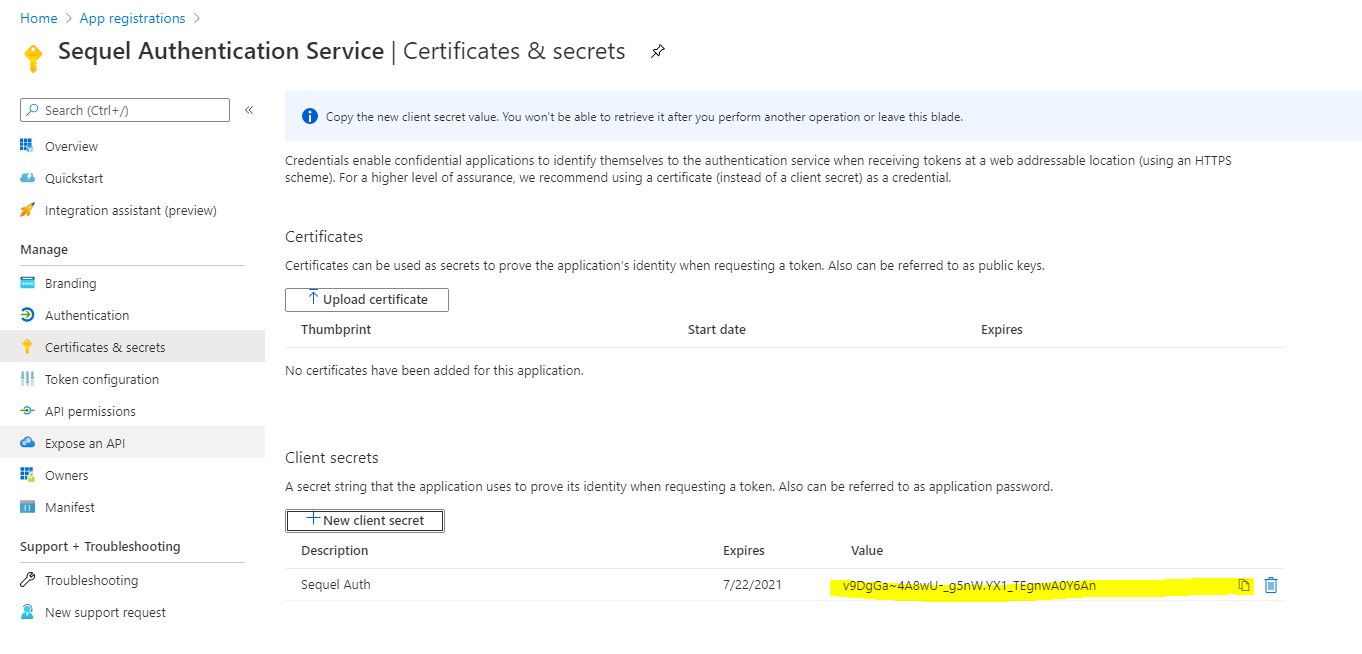
Create new secret
A Client secret needs to be created and shared with Sequel as part of the App registration. If you are in the App registration overview just select “Certificates & secrets”
- To create a client secret, select Certificates & secrets > New client secret.
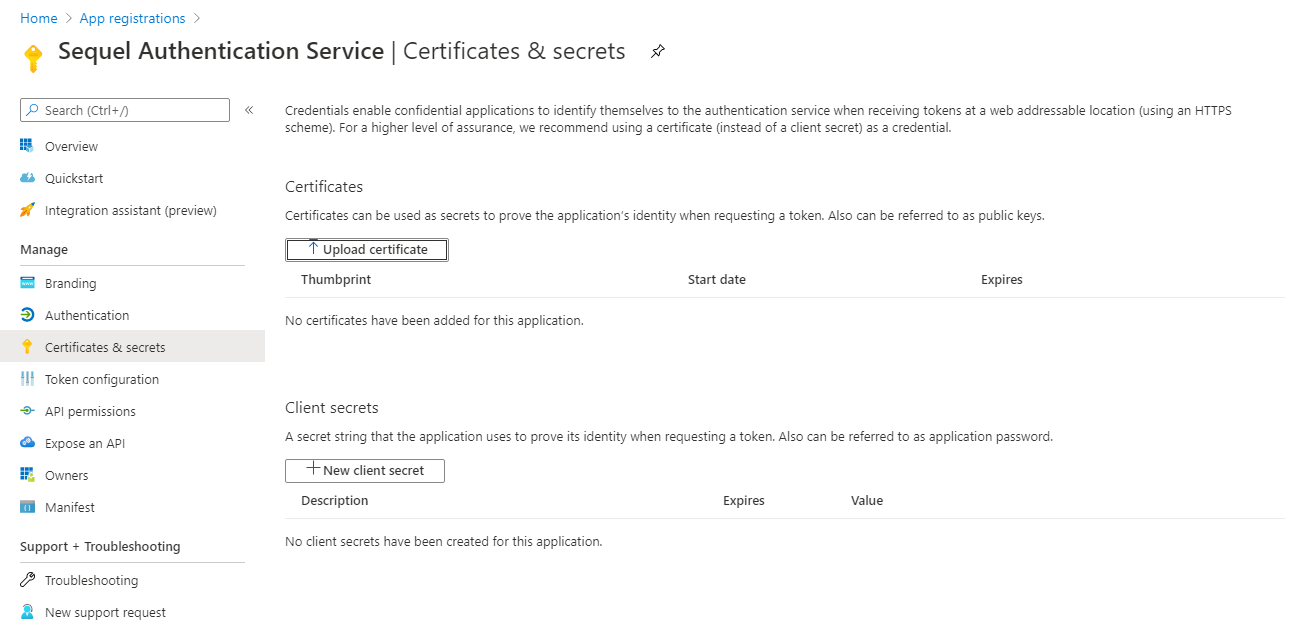
- Copy the client secret value shown in the page. It won't be shown again.
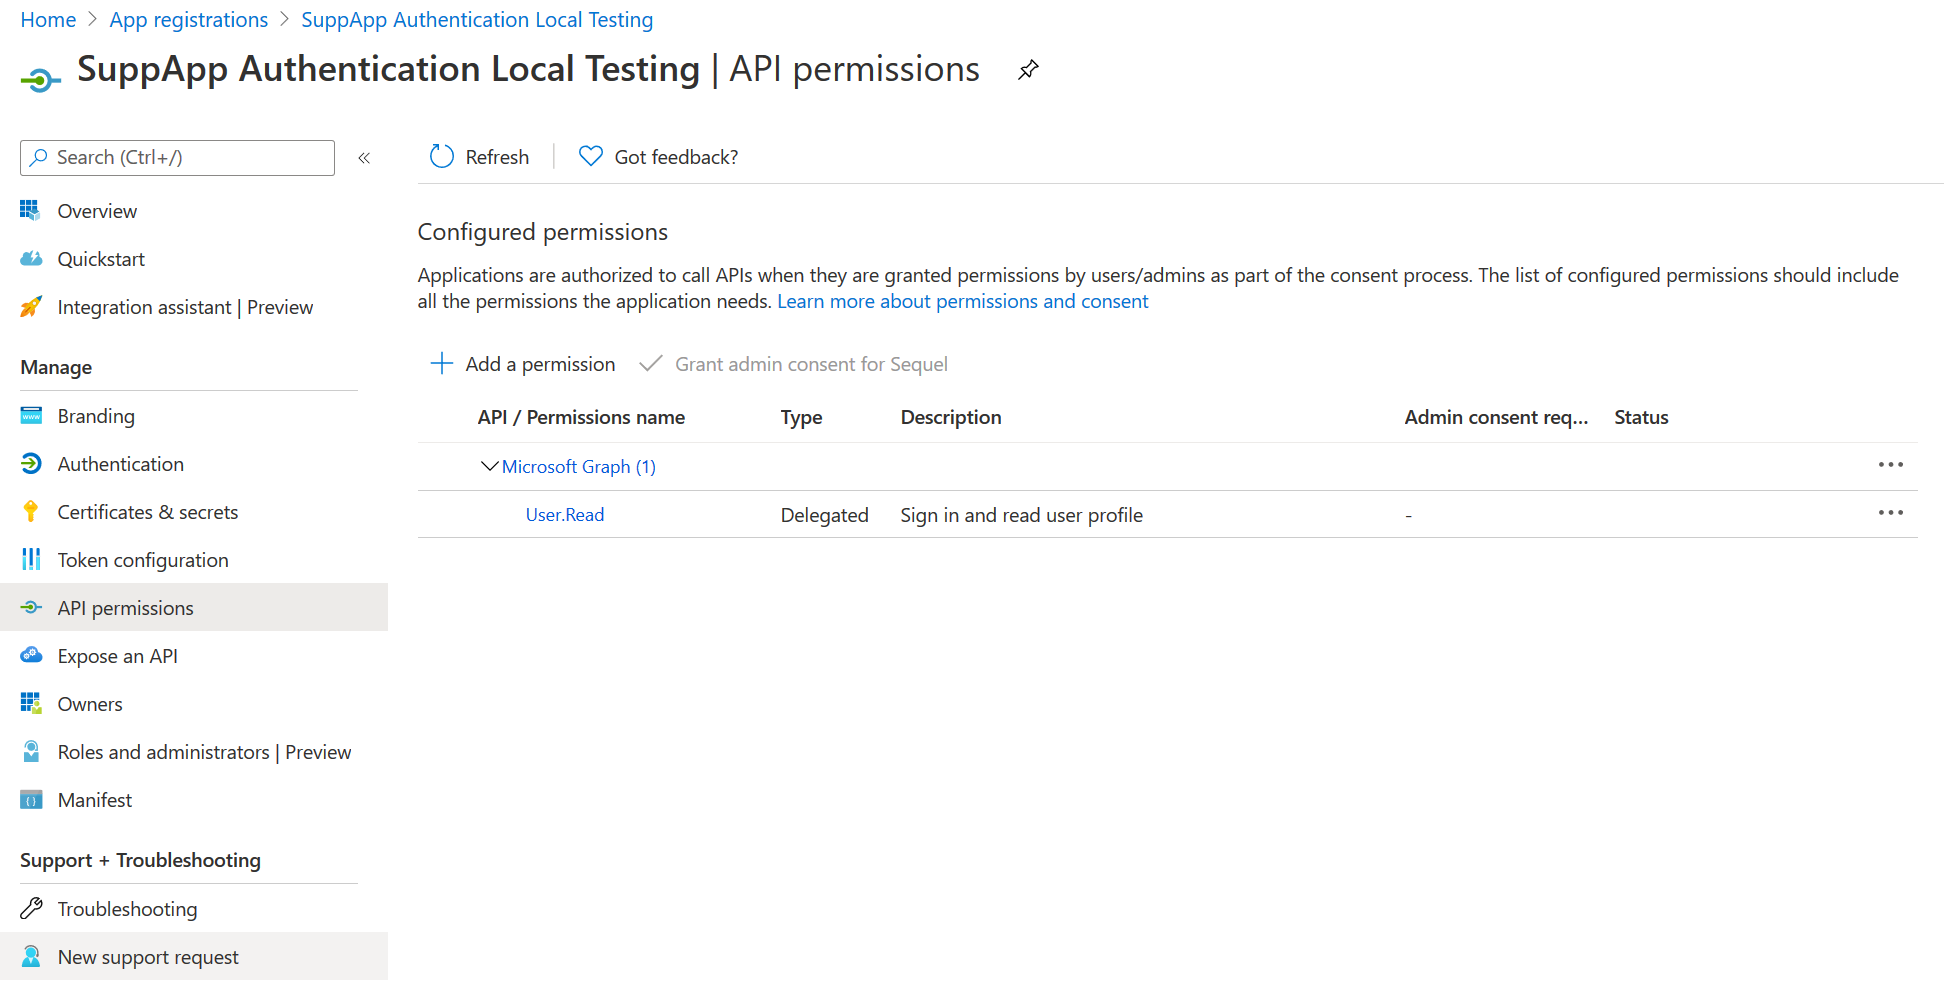
Configure API Permissions (optional)
By default will be added the User.Read permission on Microsoft Graph for the application:
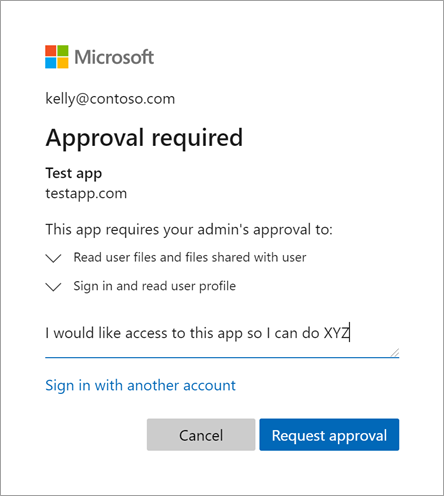
Depending on Admin Consent Workflow Configuration when a user uses for the first time the Azure AD authentication for the application the request must be review by the admin:
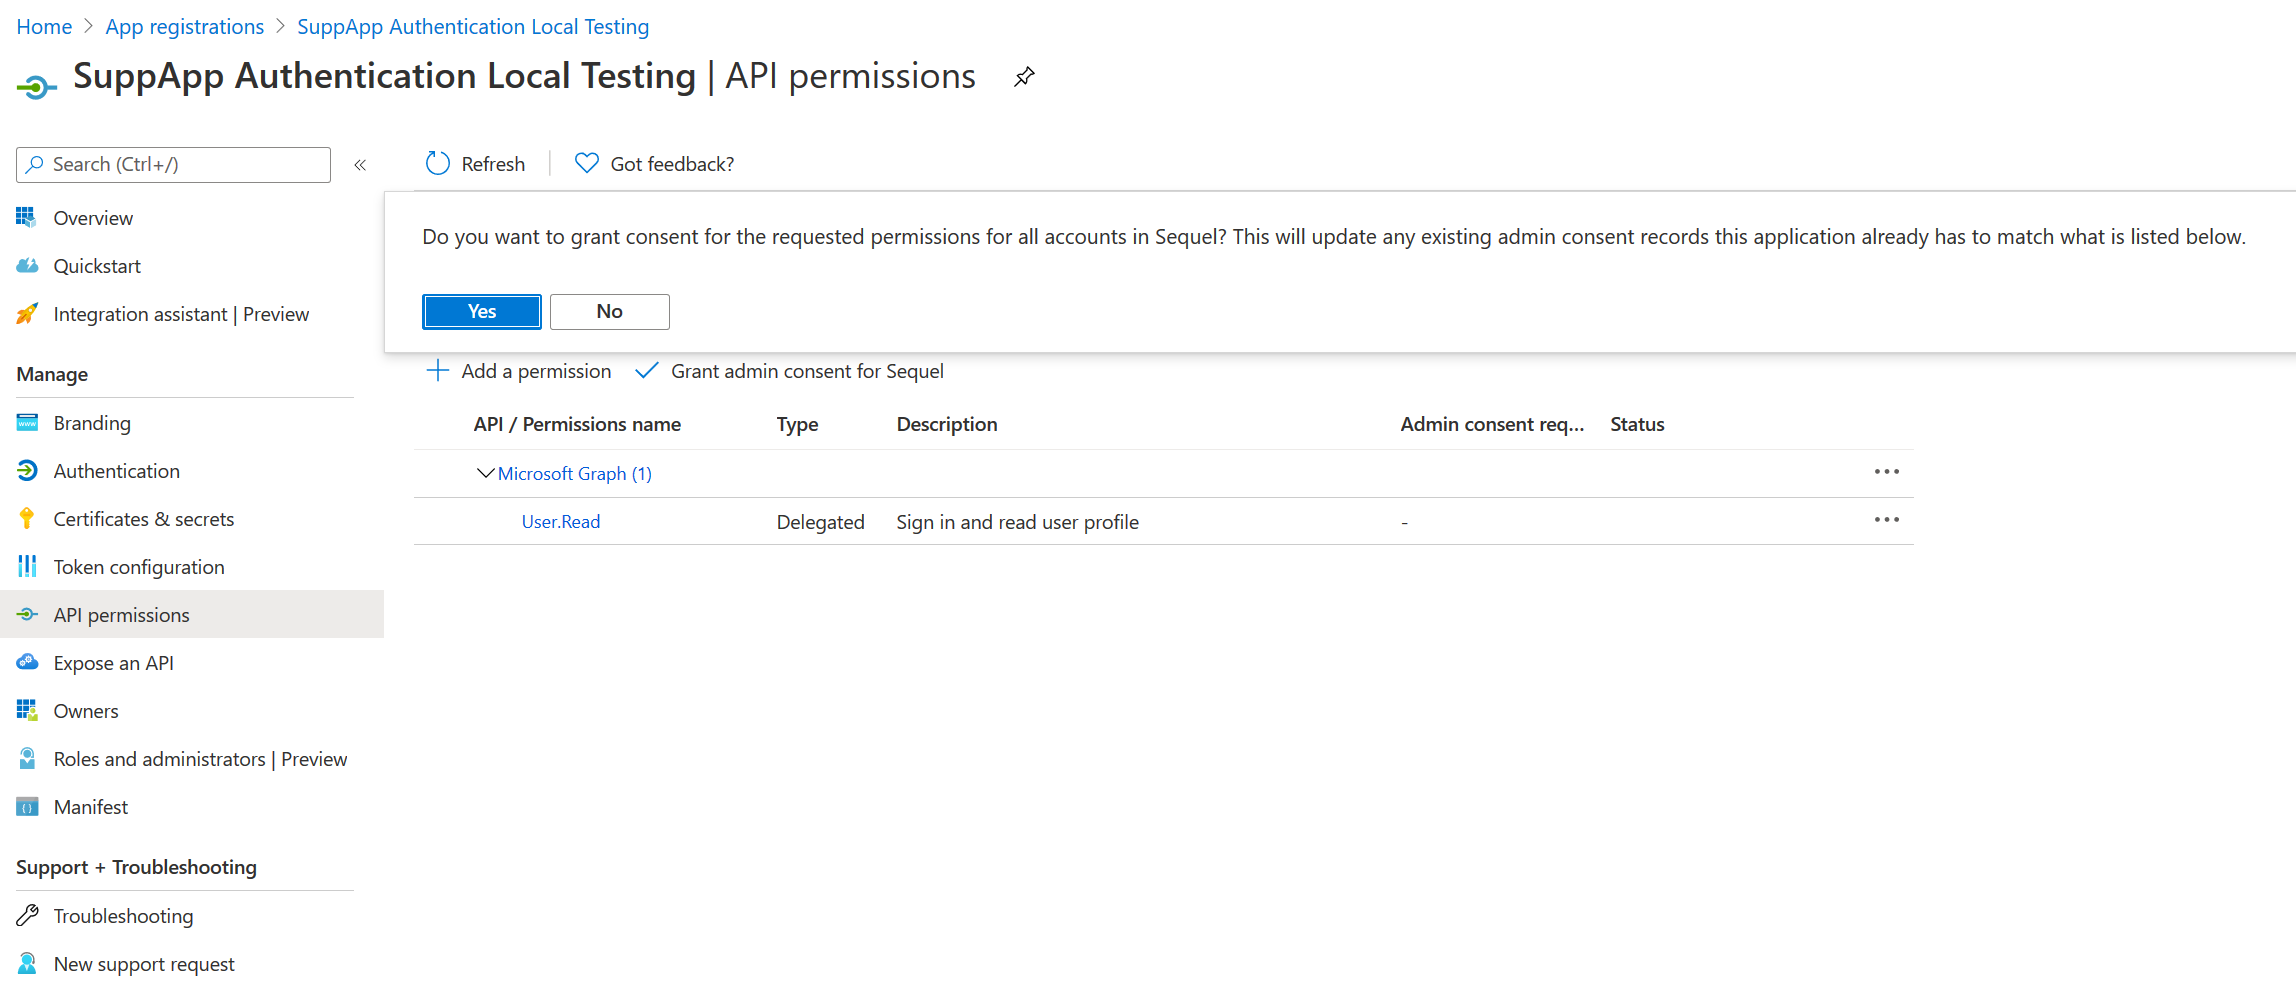
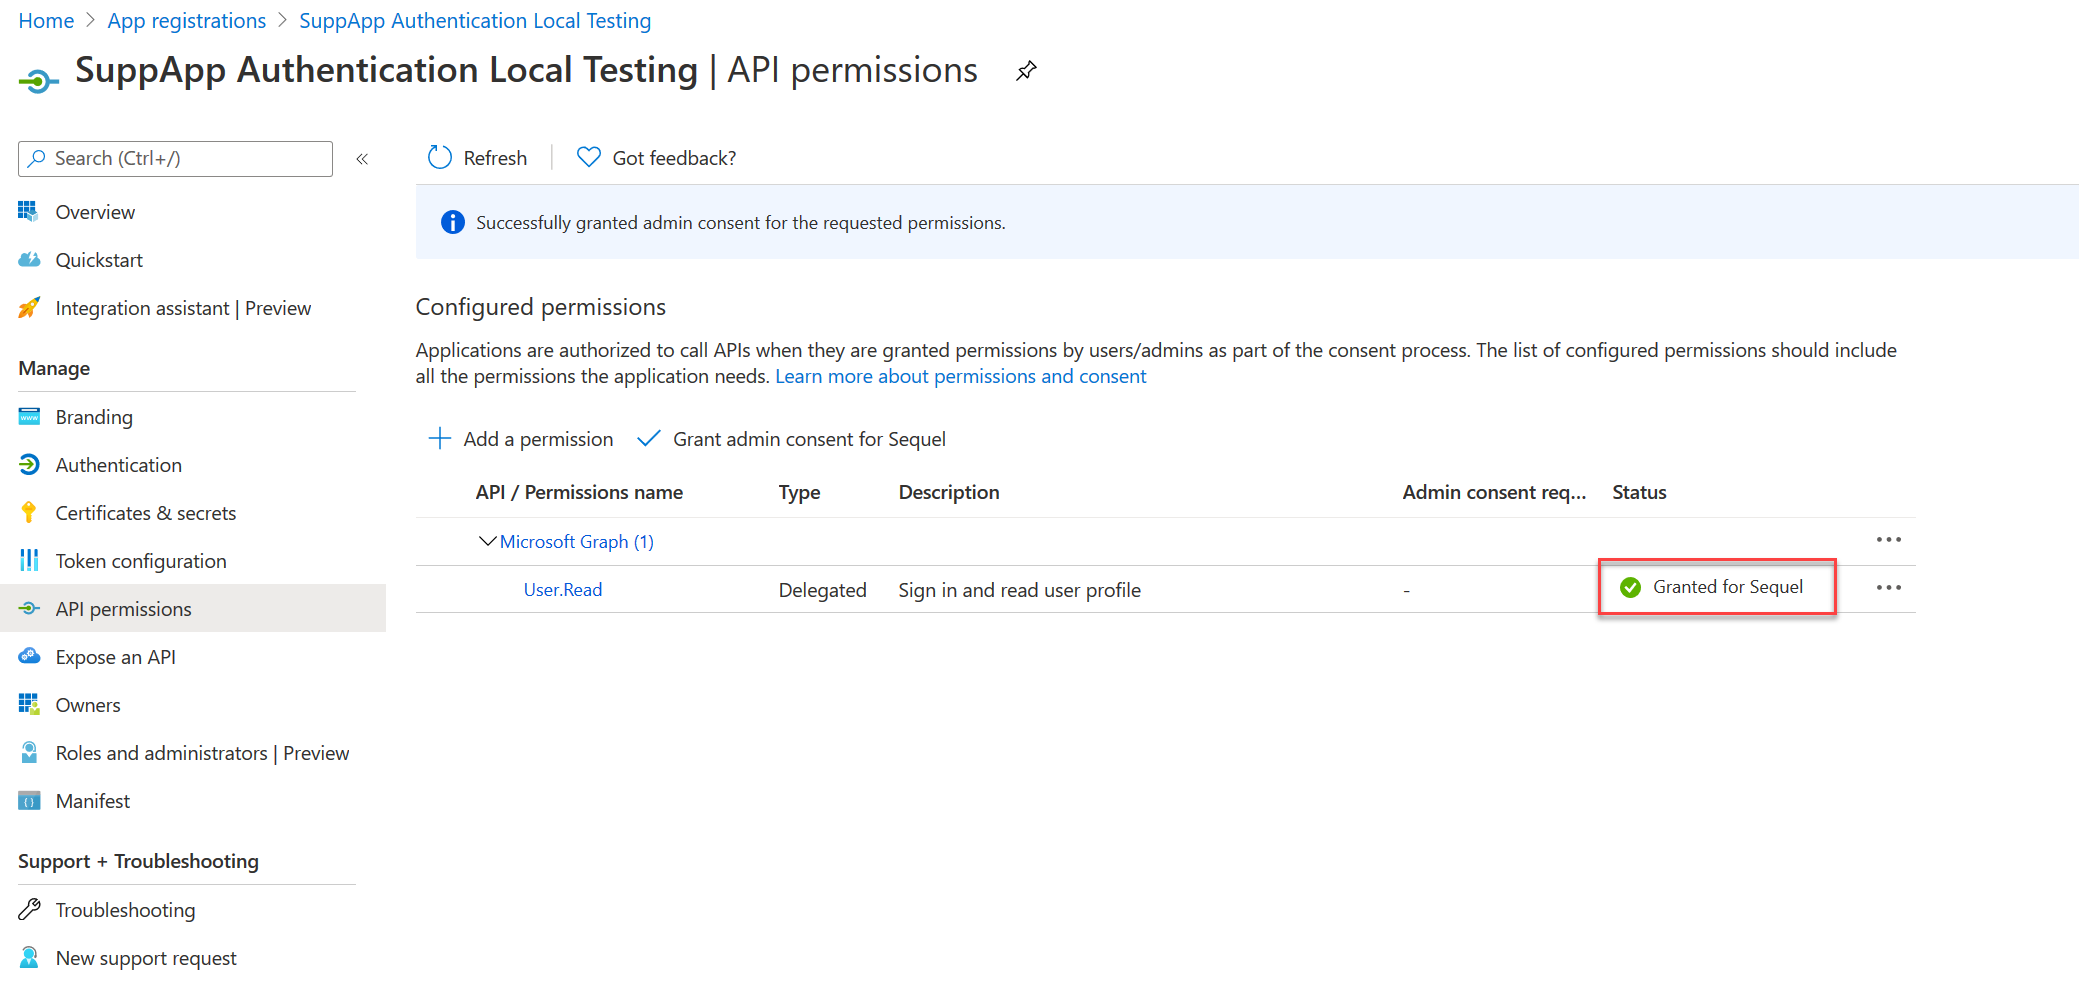
Its is possible avoid this dialog for this application and this way all requests from accounts of current Azure AD will be accepted by default like is explained in Grant admin consent in App registrations:
- Click on Grant Admin consent for button:
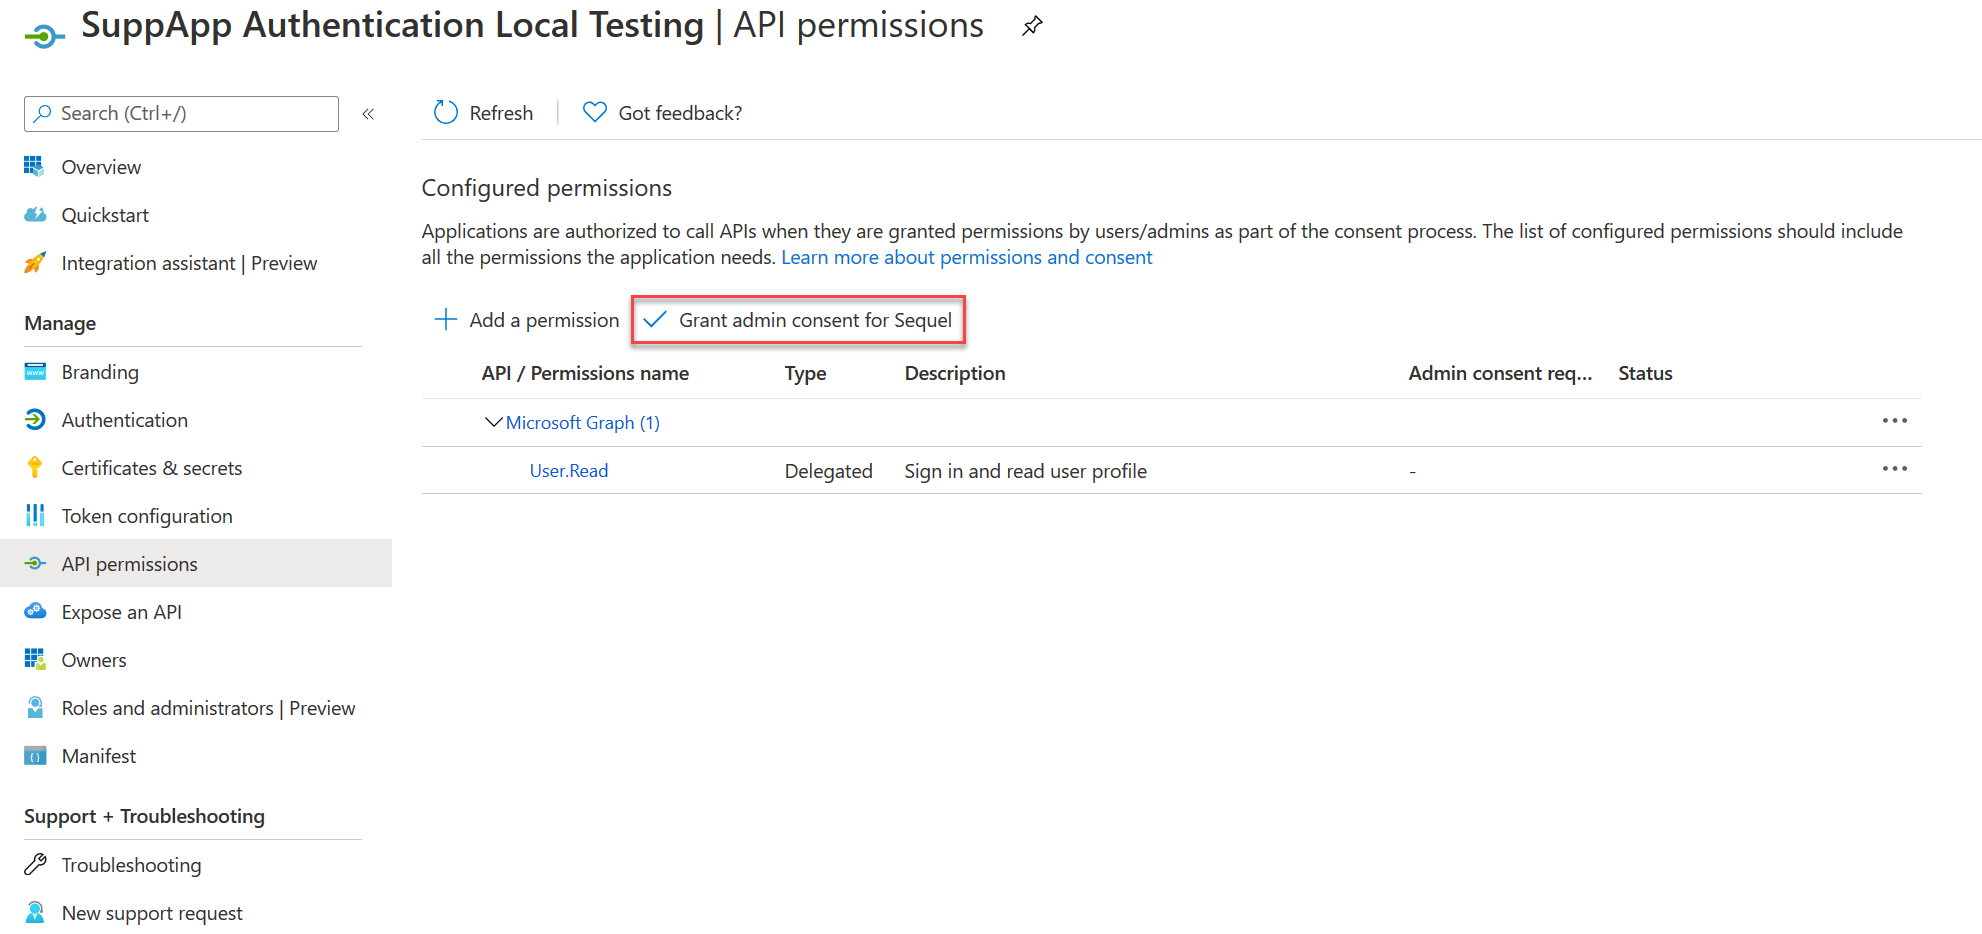
- Accept dialog box clicking on Yes button:
- Permissions will be updated showing Granted for in Status column:
Registering users for SSO
Once Sequel App is registered in Azure ID, the next step is create the users in Sequel Security Services ensuring users are created using the same email provided by Azure in the claims. This email must be stored in the email or SsoUsername fields at the users records.
Registering information for Sequel
Once the registration process is completed below information must be provided back to Sequel in order to configure the application:
Application
| Description | Value | |
|---|---|---|
| Client ID | Application (client) ID | |
| Tenant ID | Directory (tenant) ID | |
| Secret | Secret assigned by Azure |
Users
List of users to be registered:
| User name | |
|---|---|