JumpCloud Authentication Registration
Sequel Security Services allows external providers for authentication like JumpCloud. This registration process should be done for each client.
This document describes preliminary steps to be done by Sequel Clients to register a Sequel Application in JumpCloud.
Single Sign On with SAML 2.0 at JumpCloud
Registering an SSO in JumpCloud for be used for Security Authentication is described in https://support.jumpcloud.com/support/s/article/single-sign-on-sso-with-saml-20-connector1.
This document tries to provide samples of the process. Please, keep in mind that JumpCloud UI could change since this document was released.
Required information
For registering an SSO in JumpCloud we need the following information:
Application name
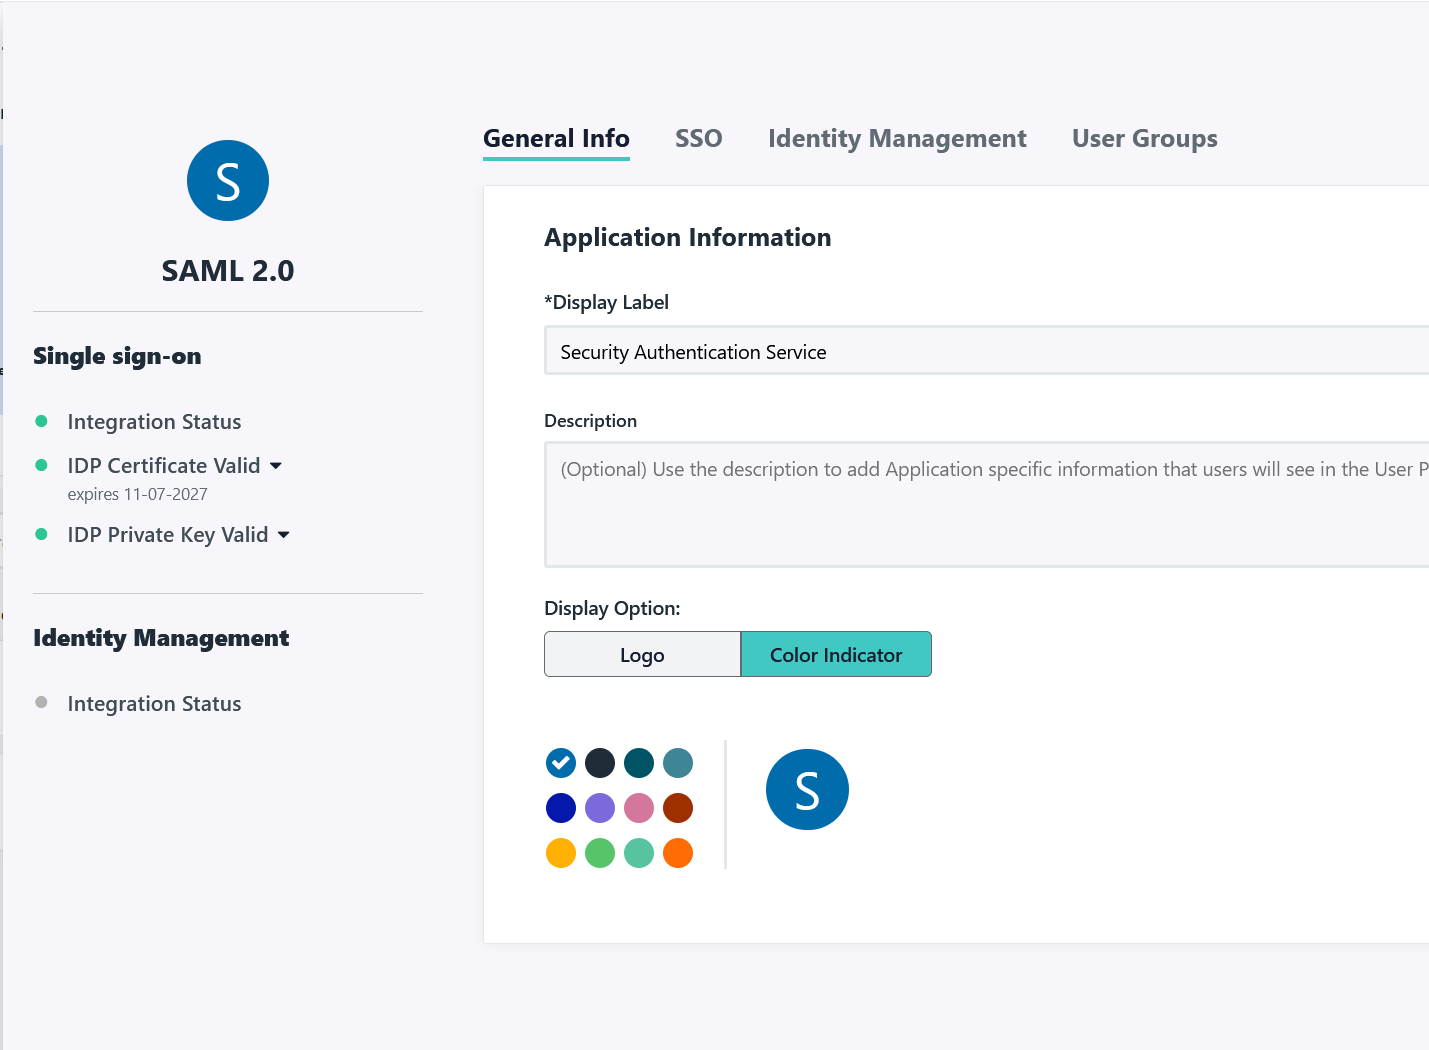
This is a friendly name for the application; we will suggest to use Sequel Authentication Service; but this can be changed and also it could include references to production or UAT environments (ie. Sequel Authentication Service - Production, Sequel Authentication Service - UAT).
ACS URL
This is a public URI of the Sequel's authentication service. Usually, it looks like this: Sequel-AuthN-Base-URI/JumpCloud/Callback (e.g. https://sequel_domain/Authentication/JumpCloud/Callback). For this implementation the URI will be:
https://TO_BE_CONFIRMED/JumpCloud/Callback
Redirect URI's are case sensitive.
Register SSO application
As a summary of this process, we will have to perform the following steps:
-
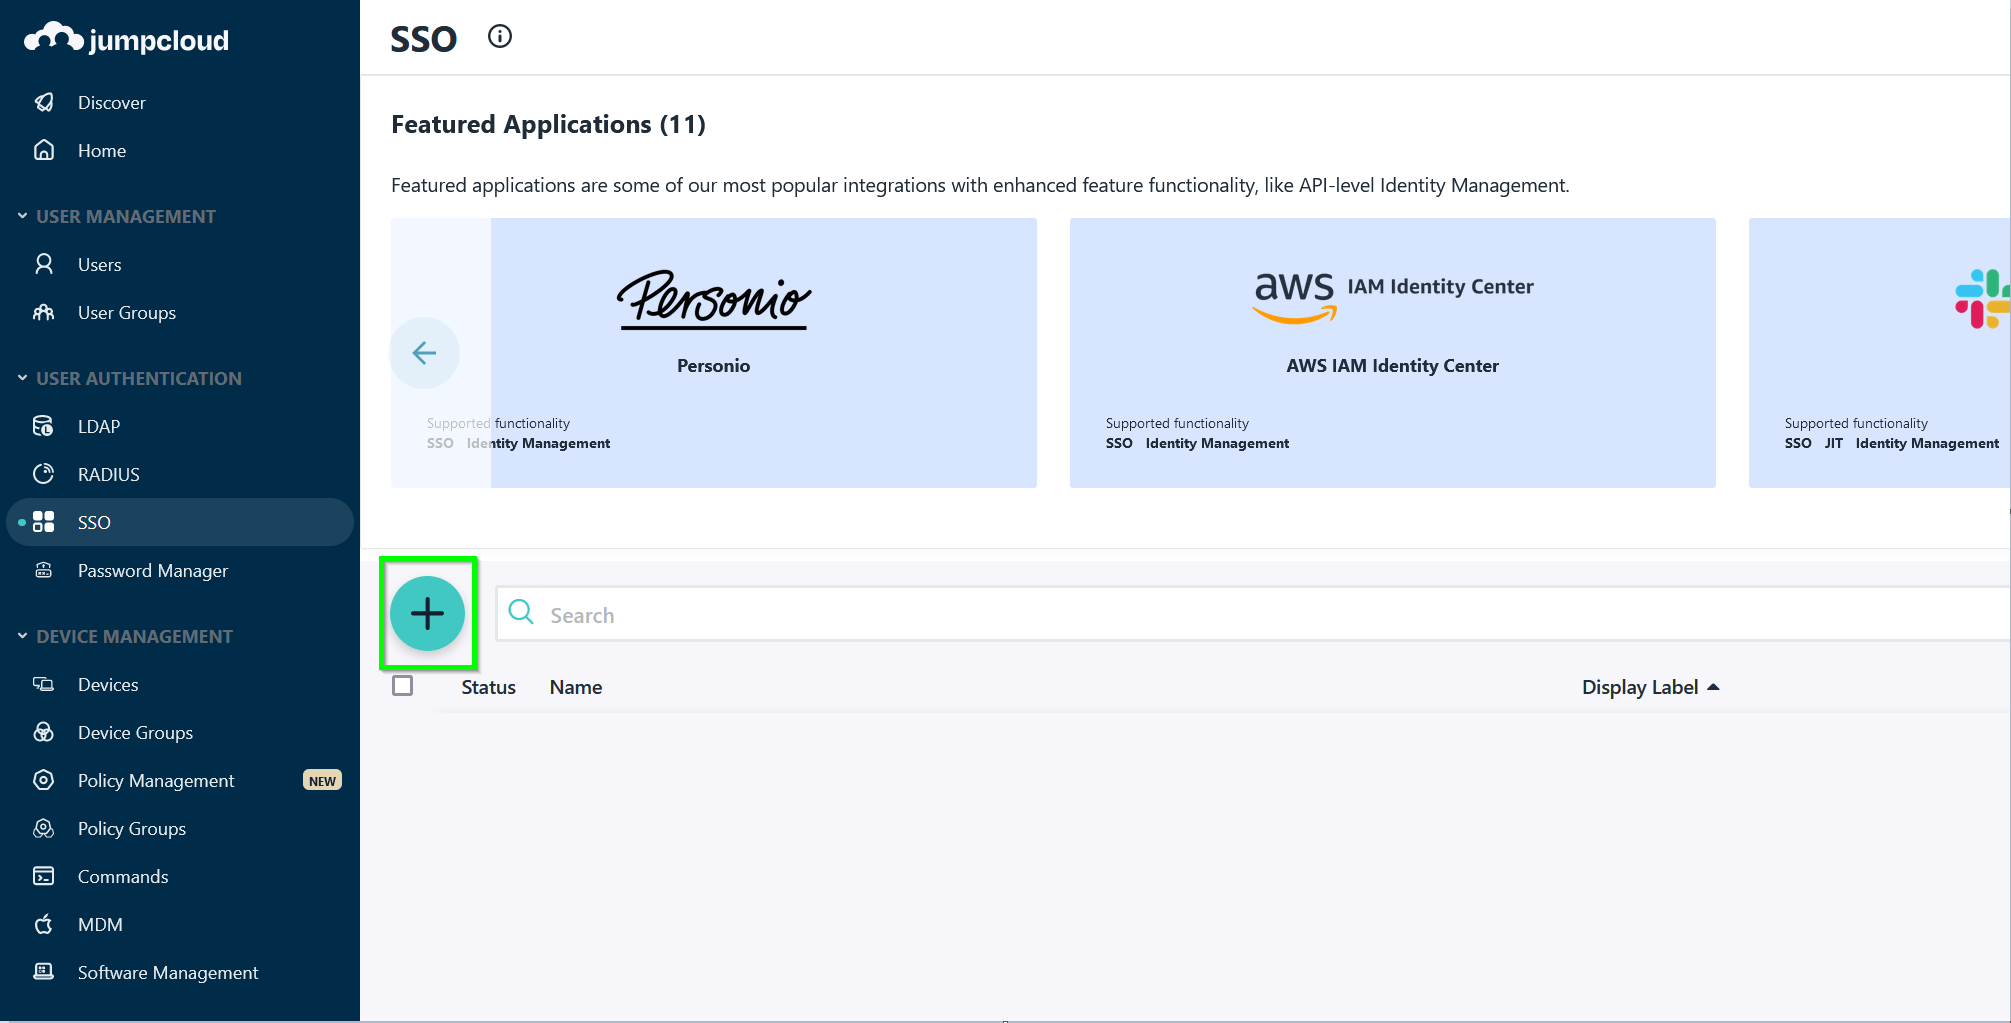
Sign in to the JumpCloud administration portal.
-
Select SSO > +.
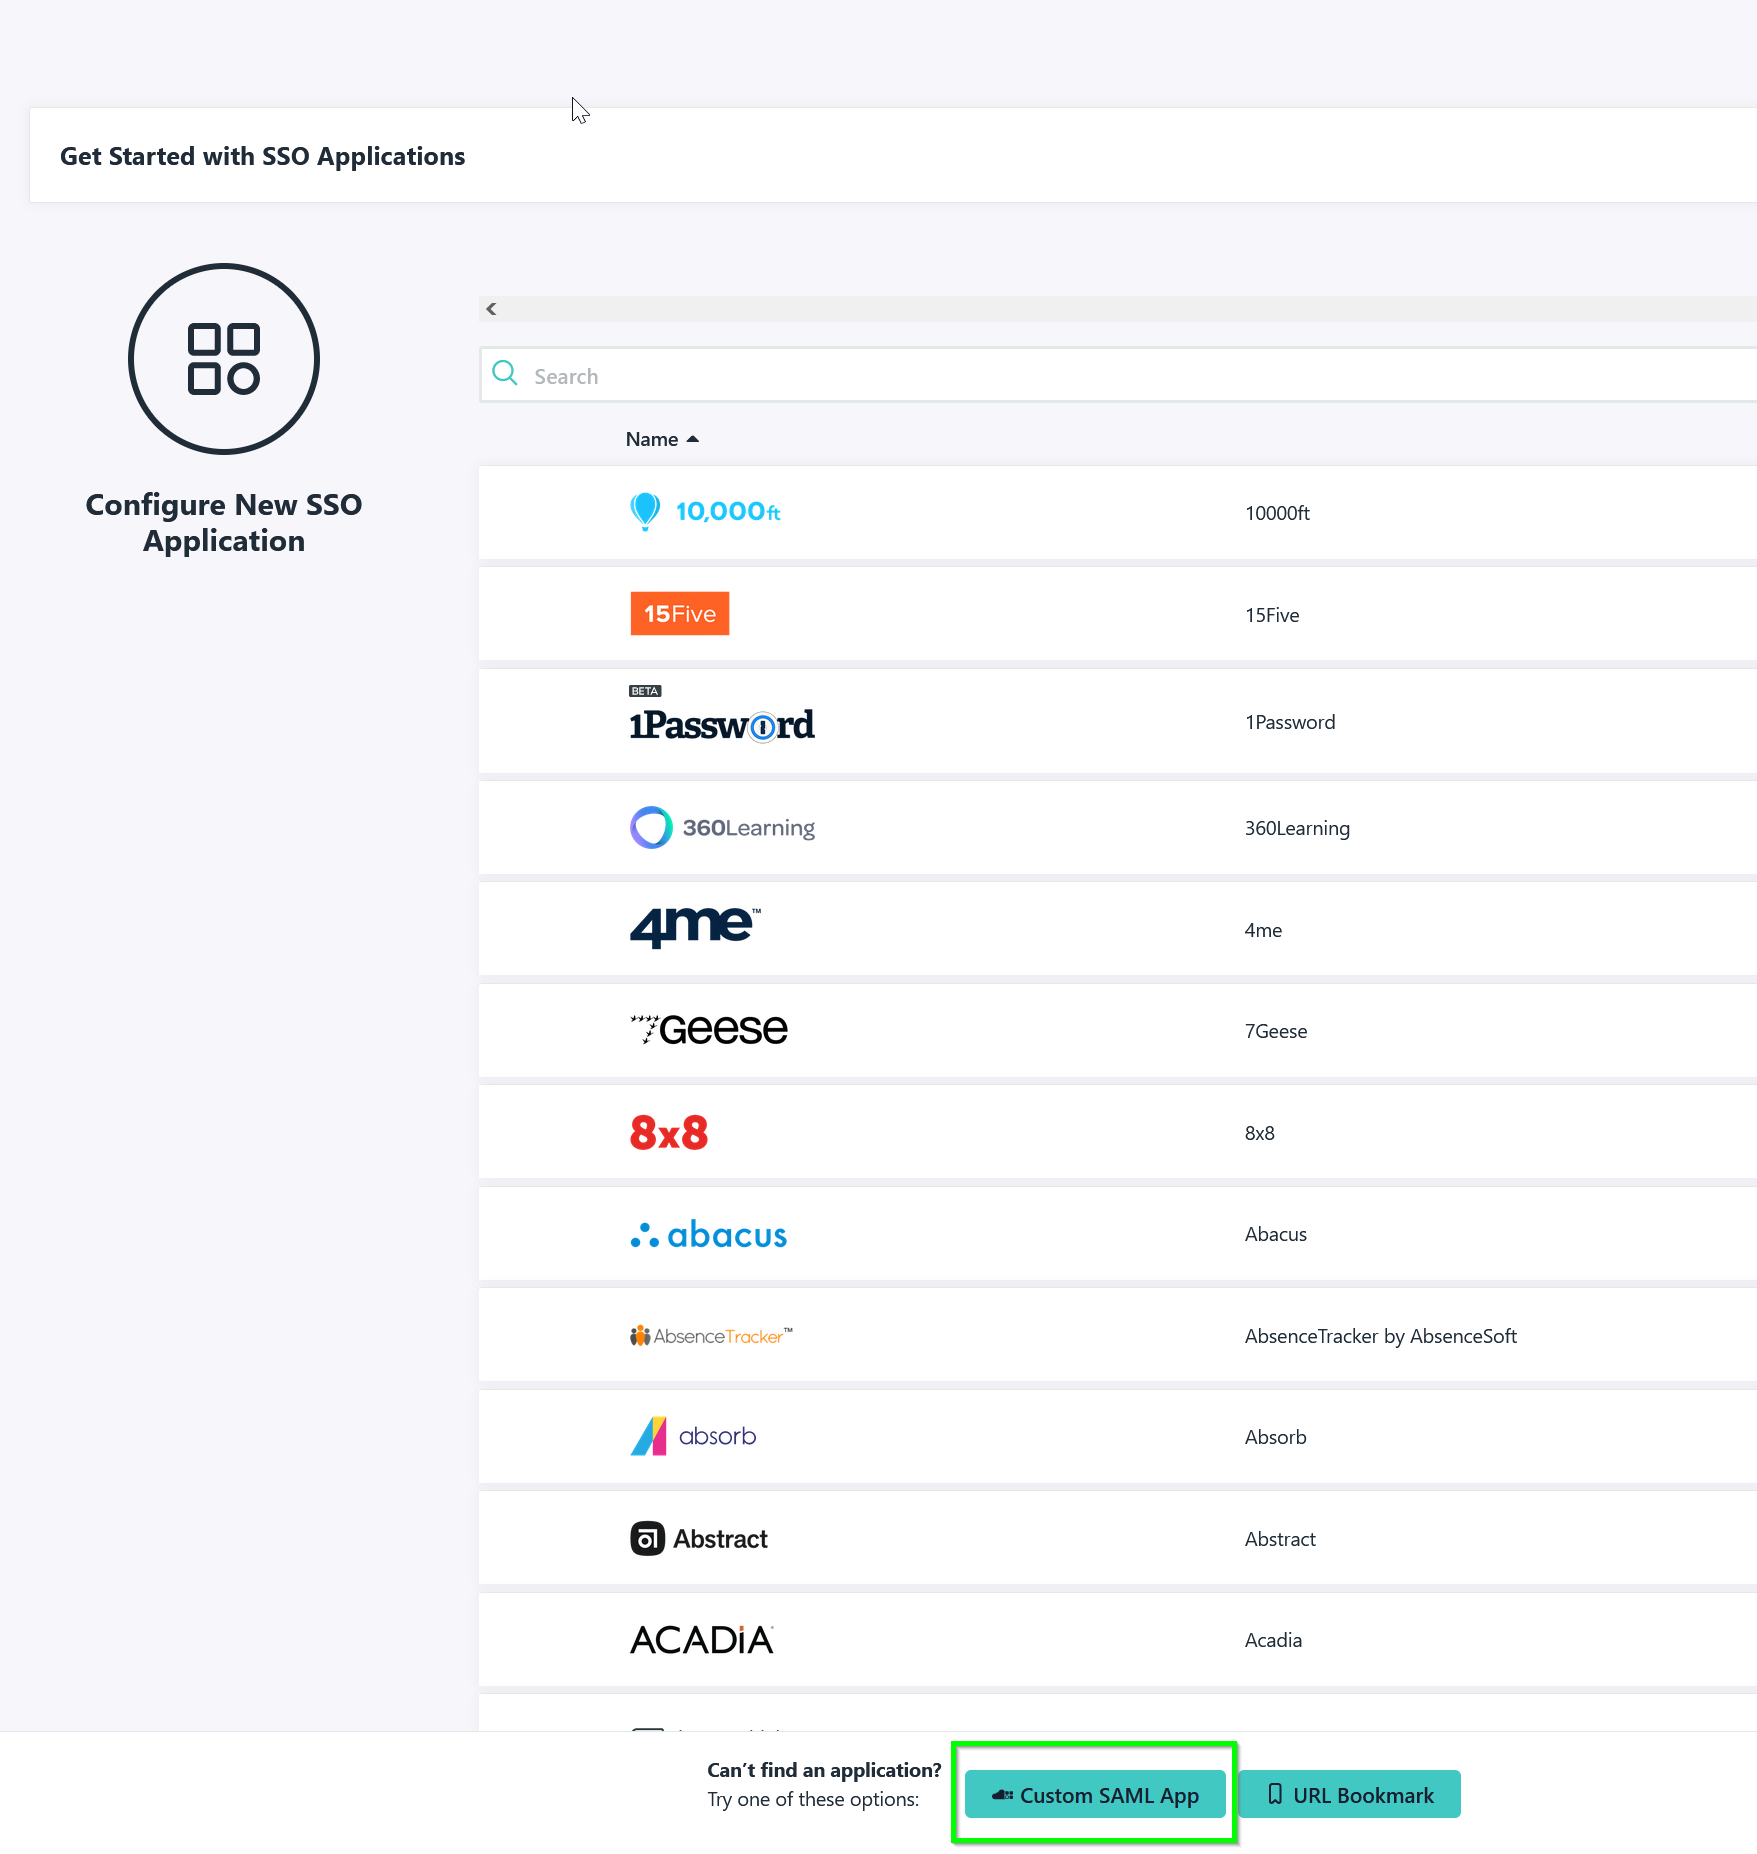
-
Click on SSO > + > Custom SAML App.
-
General Info
-
SSO.
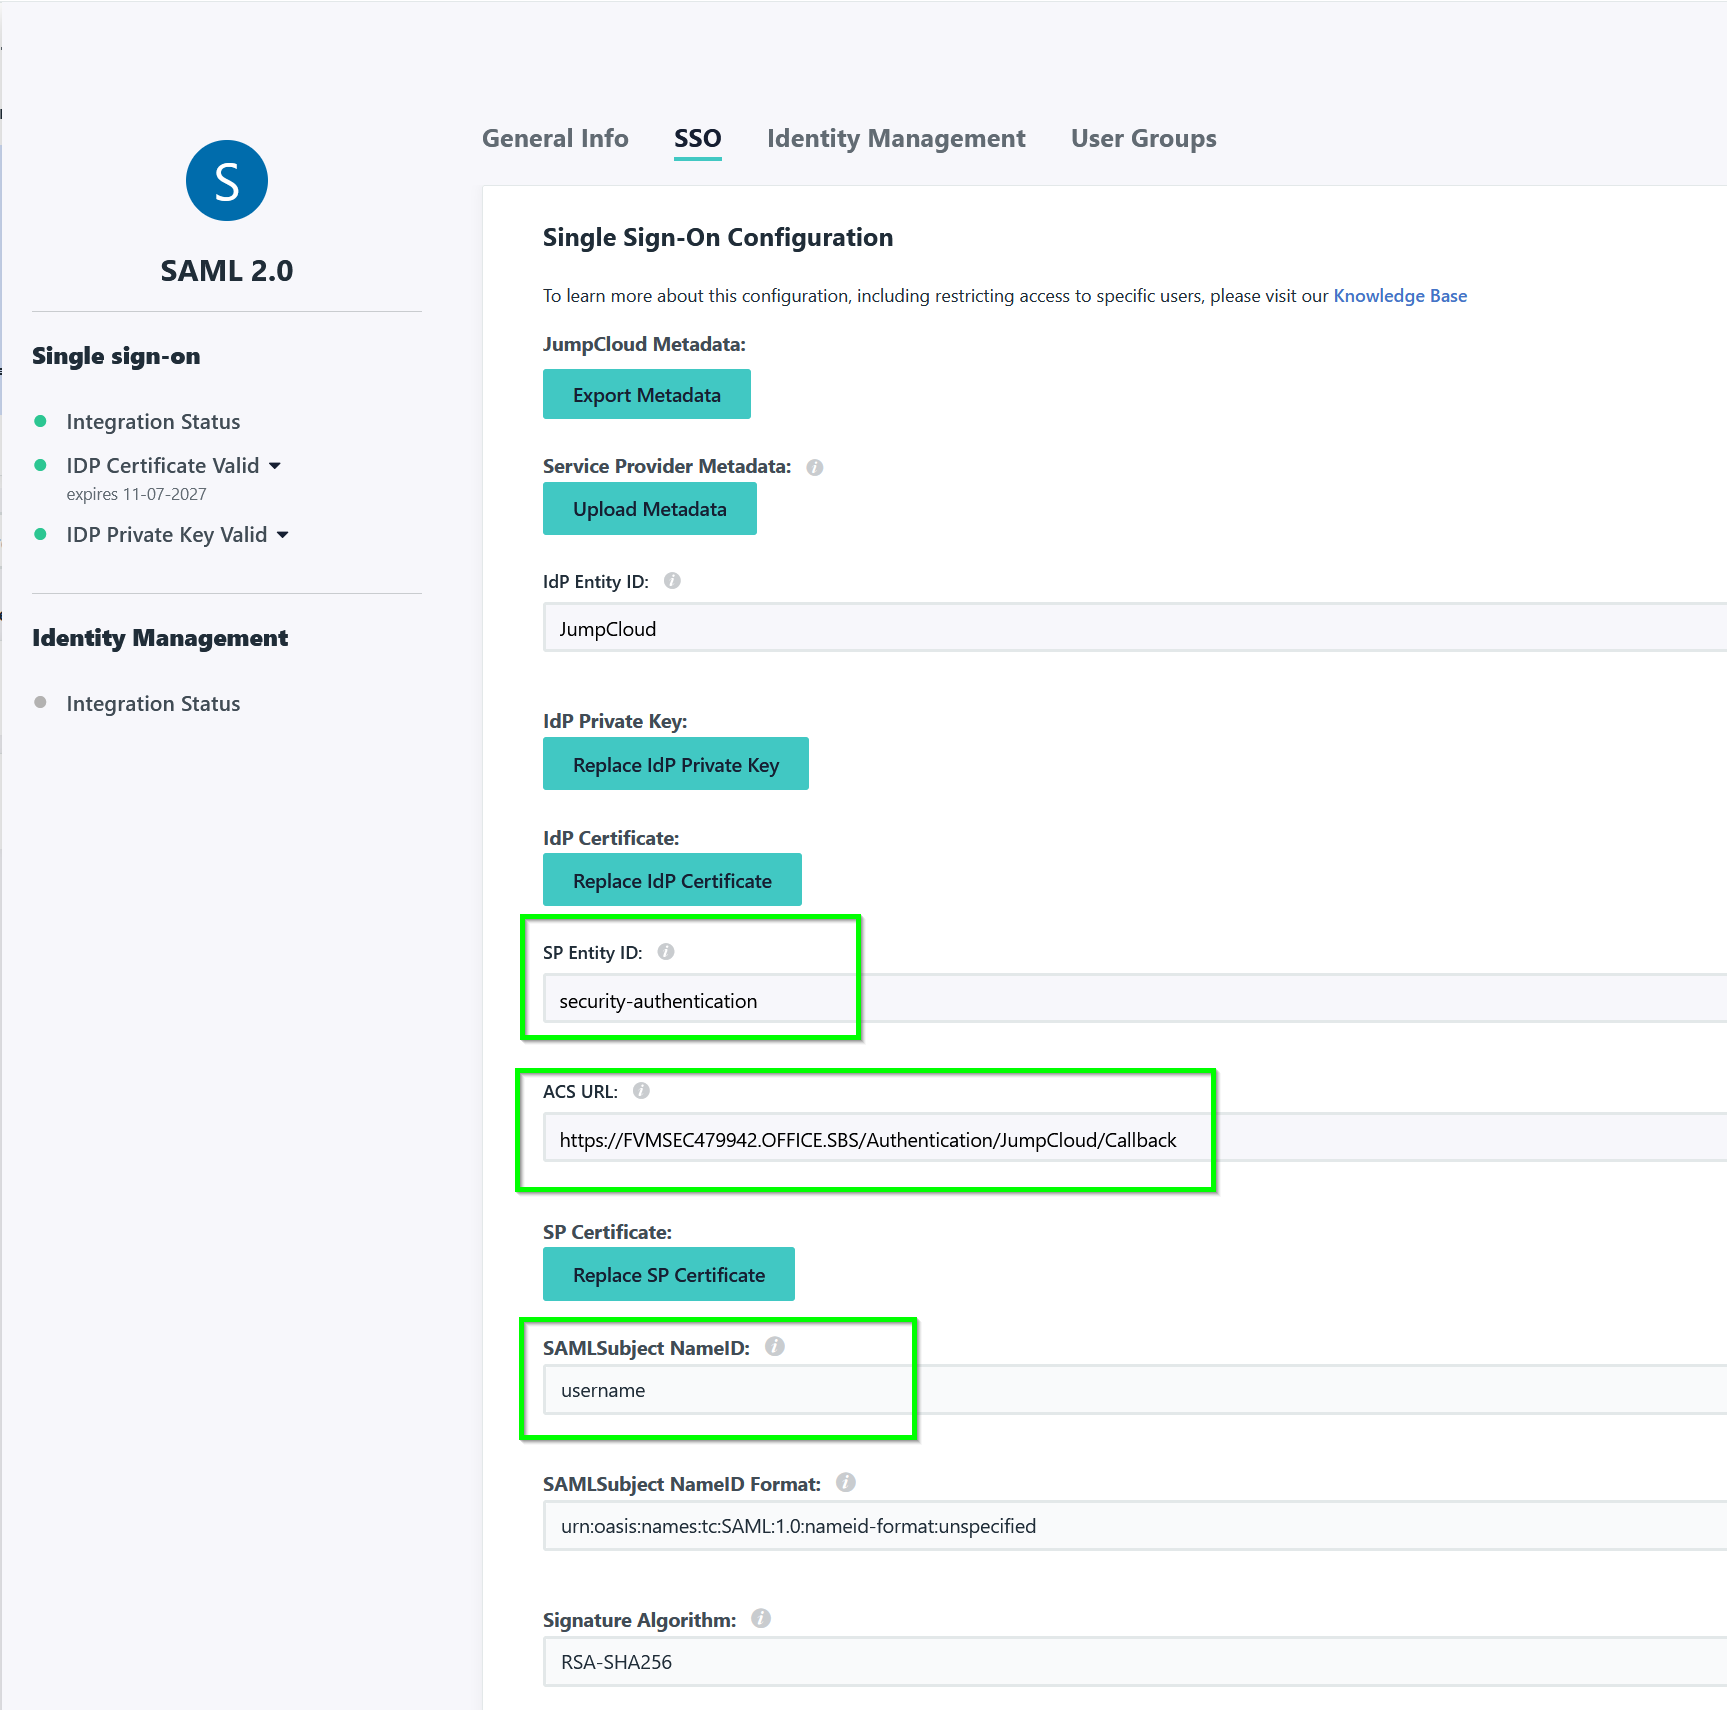
- SP Entity ID: SPEntityId property in JumpCloud settings in Security Authentication
- ACS URL: This value must be pointing to the Security Authentication service which will use this IdP.
- SAMLSubject NameID: This property will be username as username to find the user in Security Authentication service.
-
SSOO
-
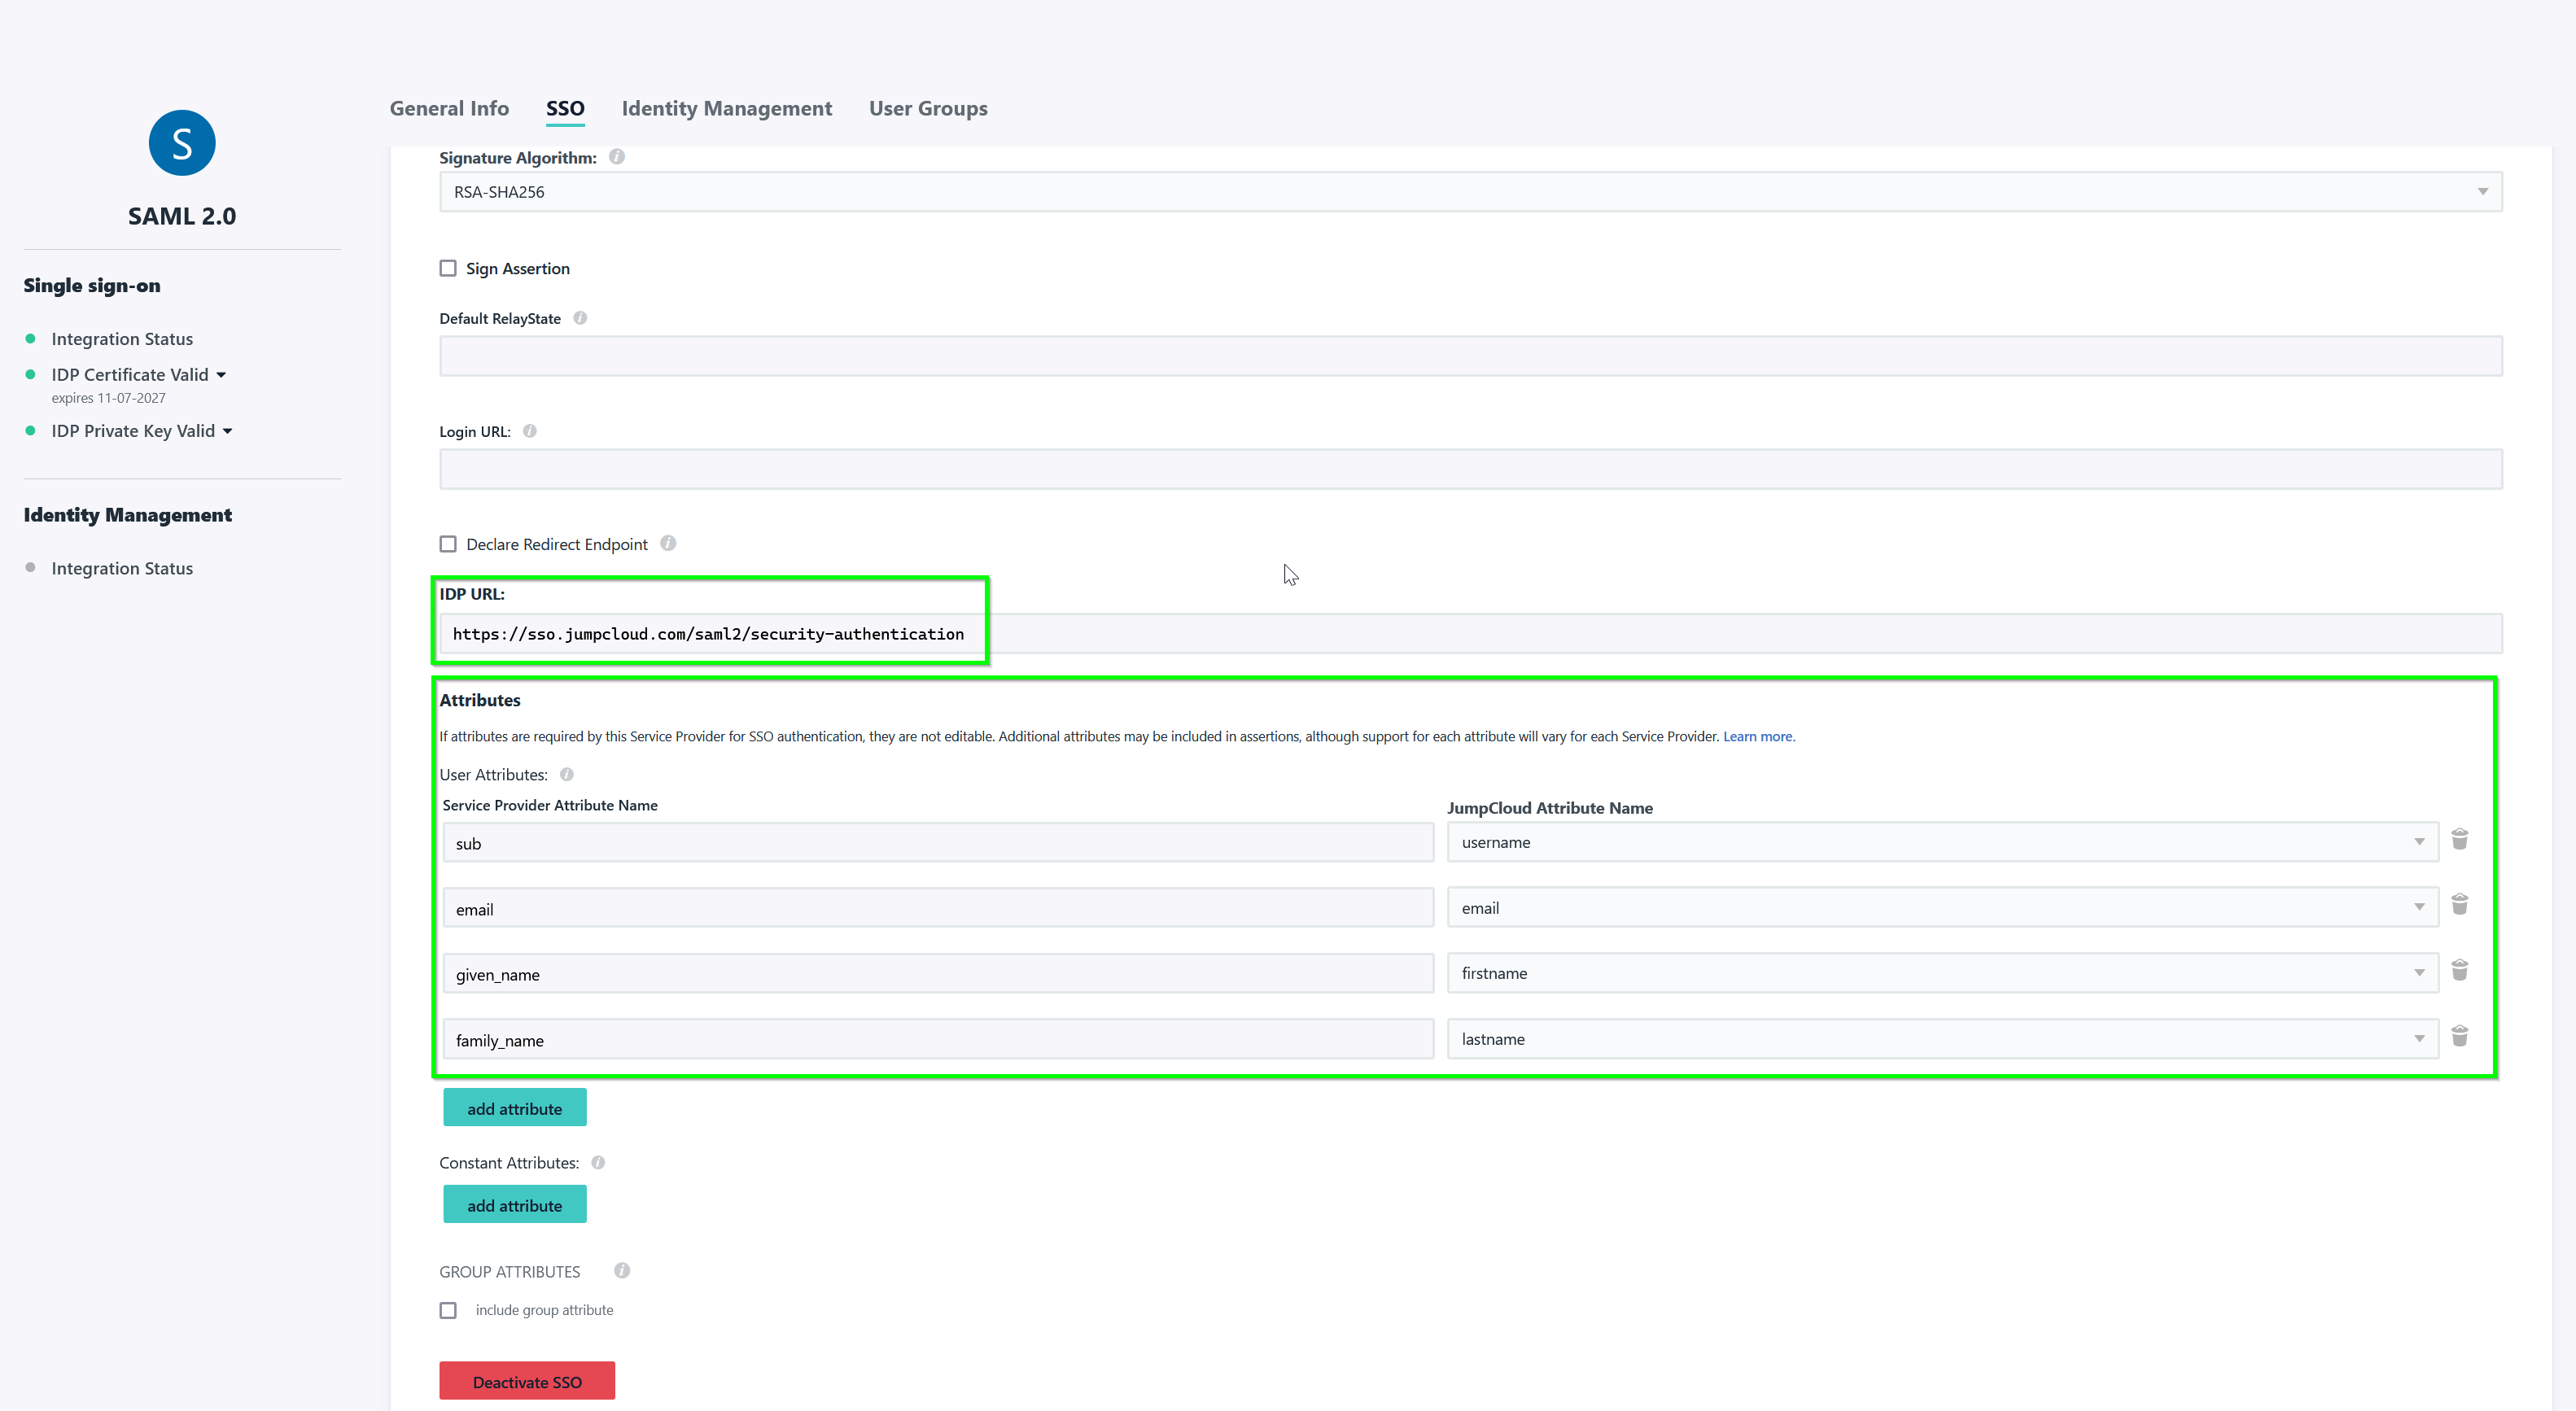
IDP URL: LoginURL property in JumpCloud settings in Security Authentication
-
Attributes: These mappings are necessary for matching between JumpCloud's users and Security Authentication's users.
Service Provider Attribute Name (Security Authentication) JumpCloud Attribute Name sub username email email given_name firsname family_name lastname
-
-
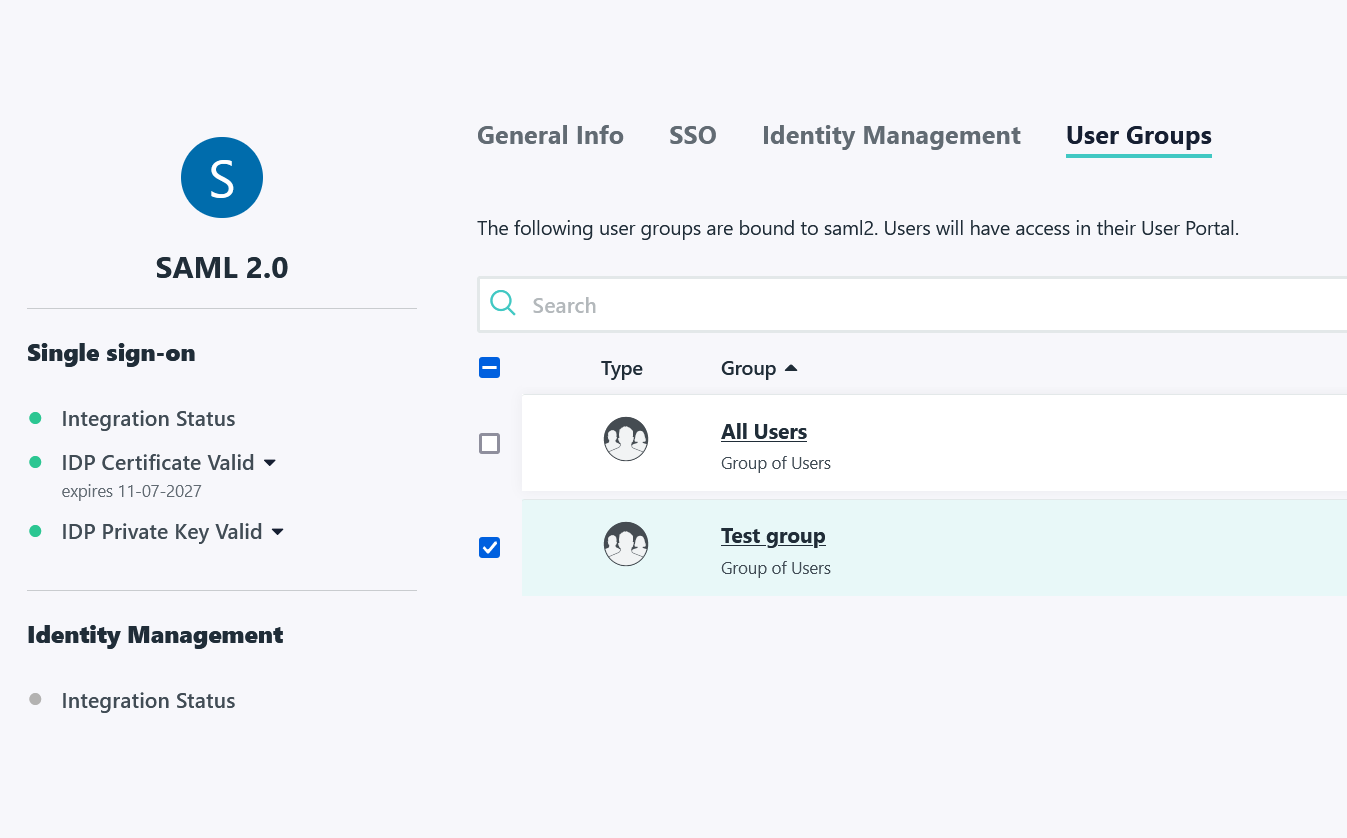
User Groups. Select which group or groups of JumpCloud users will be able to use this login provider
-
Save configuration
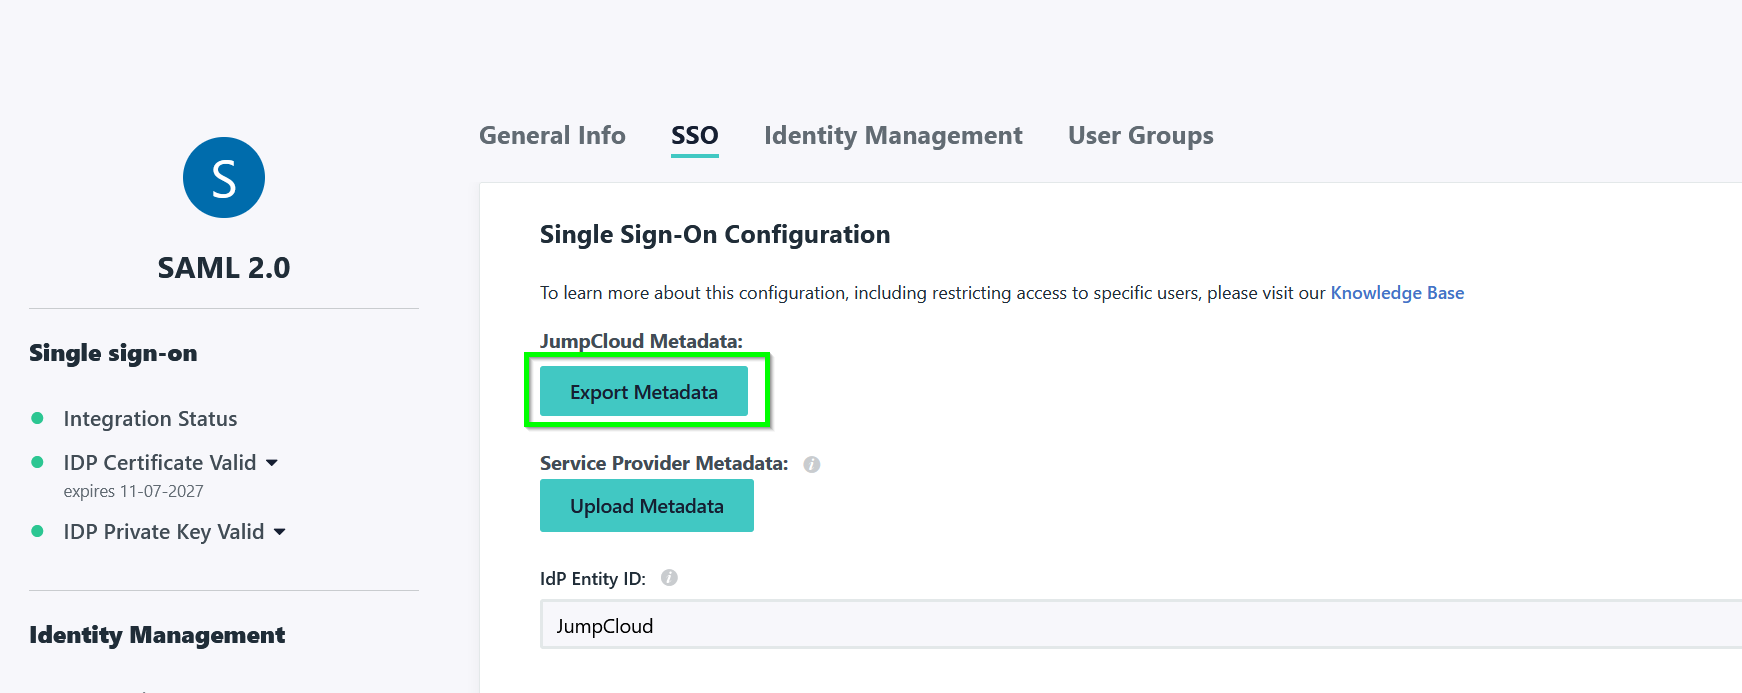
Get X509 Certificate info
After complete the SSO Application registering, configuration can be exported as XML:
From the XML file generated: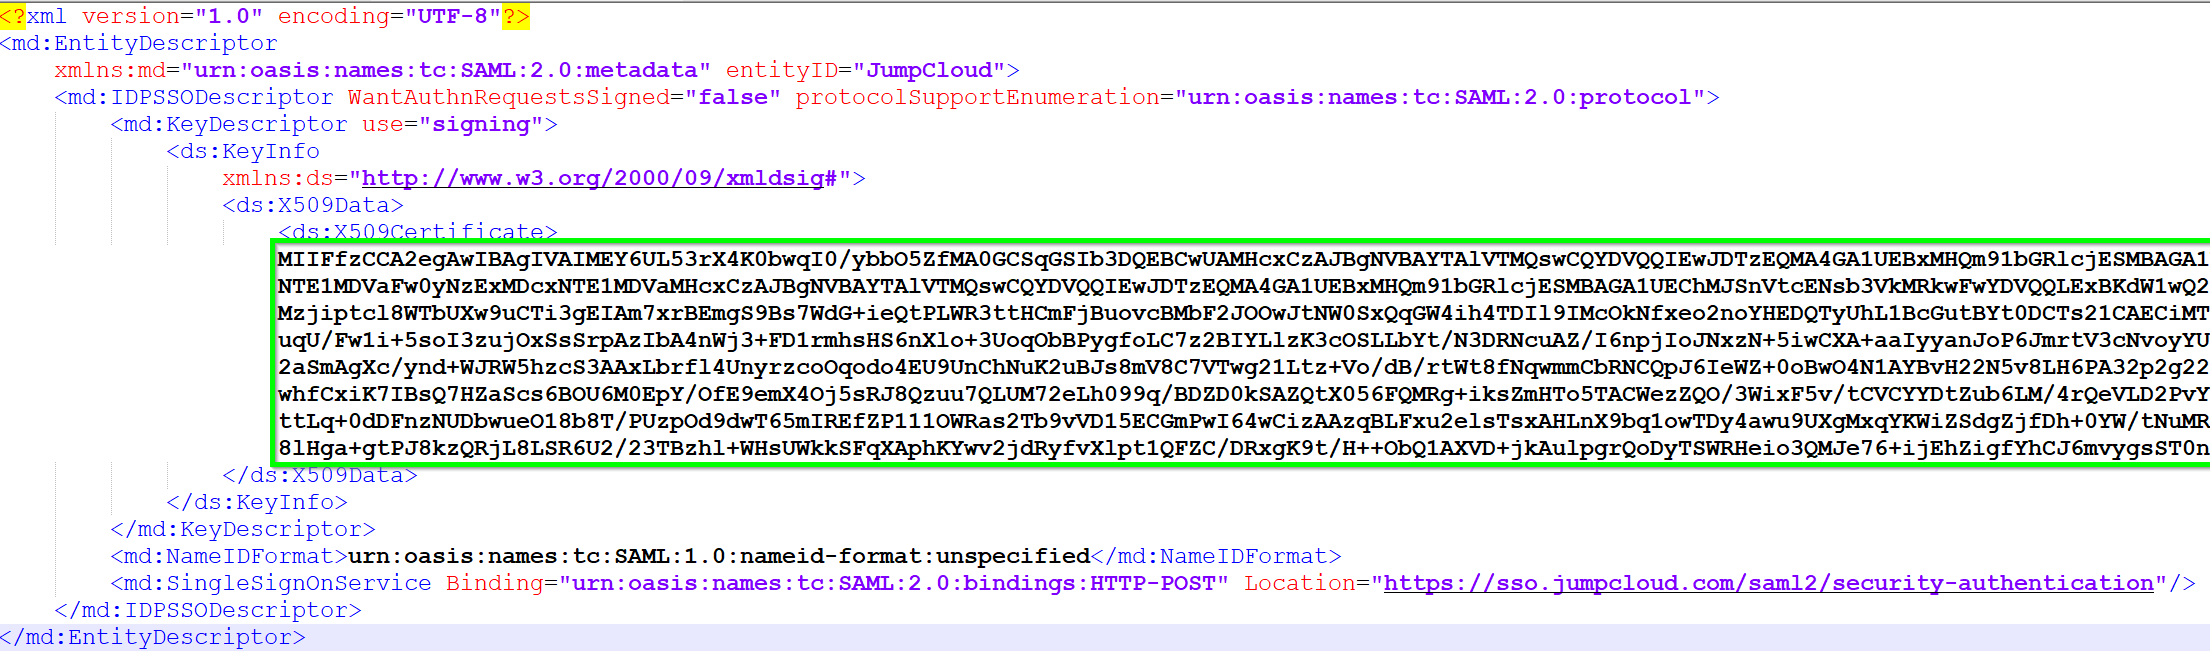
- X509Certificate: This certificate must be placed in X509SigningCertificate property in JumpCloud settings in Security Authentication.
Registering users for SSO
Once SSO application is registered in JumpCloud, the next step is create the users in Sequel Security Services ensuring users are created using the same email or username provided by JumpCloud in the claims. This email must be stored in the email or SsoUsername fields at the users records.